
LEMP Stack Setup on Ubuntu 24.04 (2025): Step-by-Step Guide for WordPress & Laravel

Setting up your own VPS (Virtual Private Server) gives you full control over your hosting environment, making it ideal for running WordPress, Laravel, or any custom PHP-based CMS. In this guide, we’ll walk through setting up a VPS from scratch on Ubuntu, installing all necessary software for a robust, secure, and scalable web environment.
What You'll Need
- A fresh Ubuntu 24.04 VPS (or later)
- Root access (or a sudo user)
- Basic command line knowledge
- Domain name (optional, but recommended)
Fast, Secure, and Hassle-Free VPS
Looking for a reliable VPS provider to get started? We recommend DigitalOcean a trusted platform known for:
- Blazing fast SSD-based servers
- One-click Ubuntu setup
- Simple dashboard and intuitive interface
- Secure and scalable infrastructure
- Global data centers for low latency
Whether you're deploying WordPress, Laravel, or a custom PHP app, DigitalOcean offers performance, simplicity, and peace of mind perfect for developers of all levels.
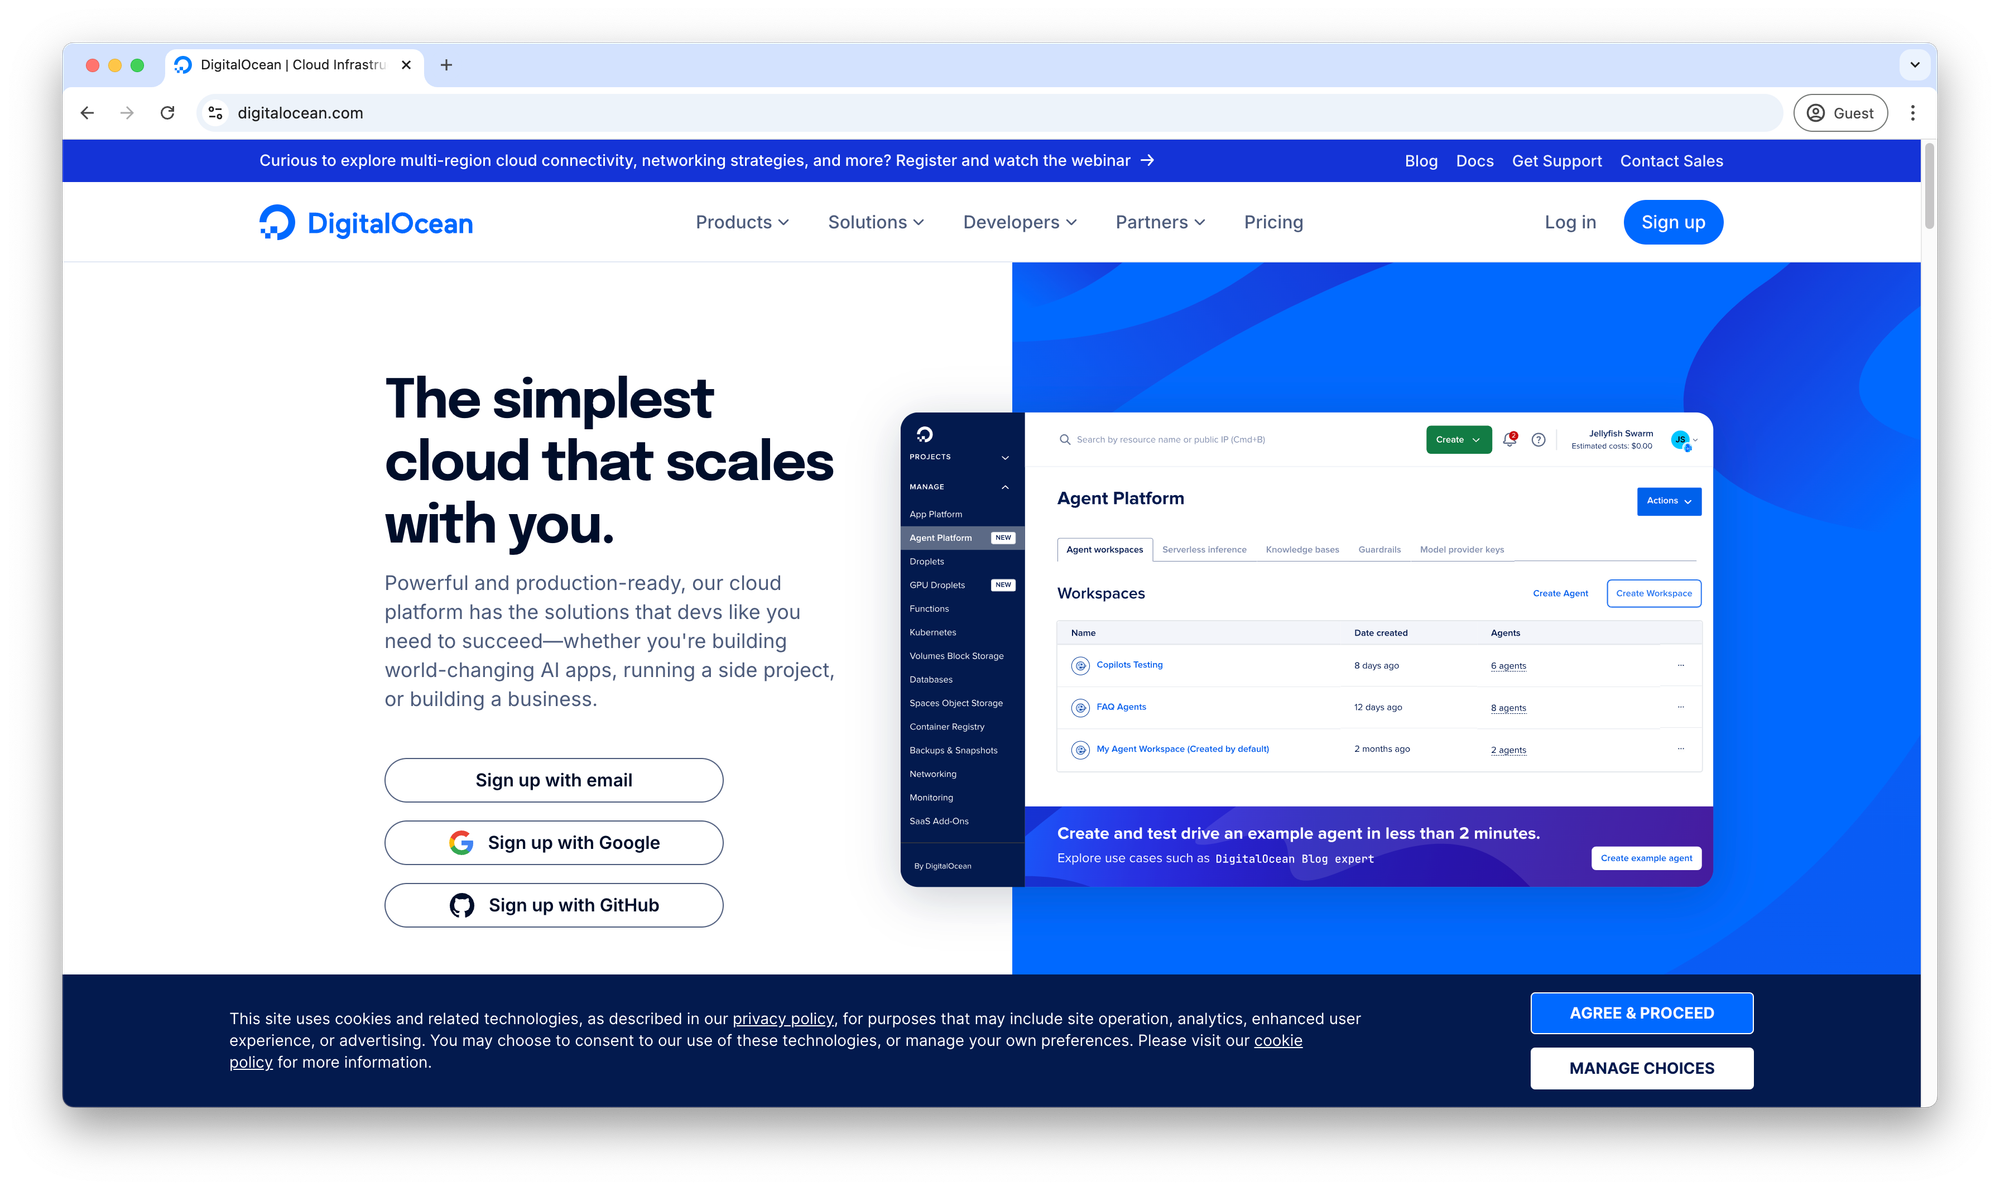
Get started with DigitalOcean and launch your VPS in minutes!
VPS Creation Instructions
Step-by-Step: Create a Droplet
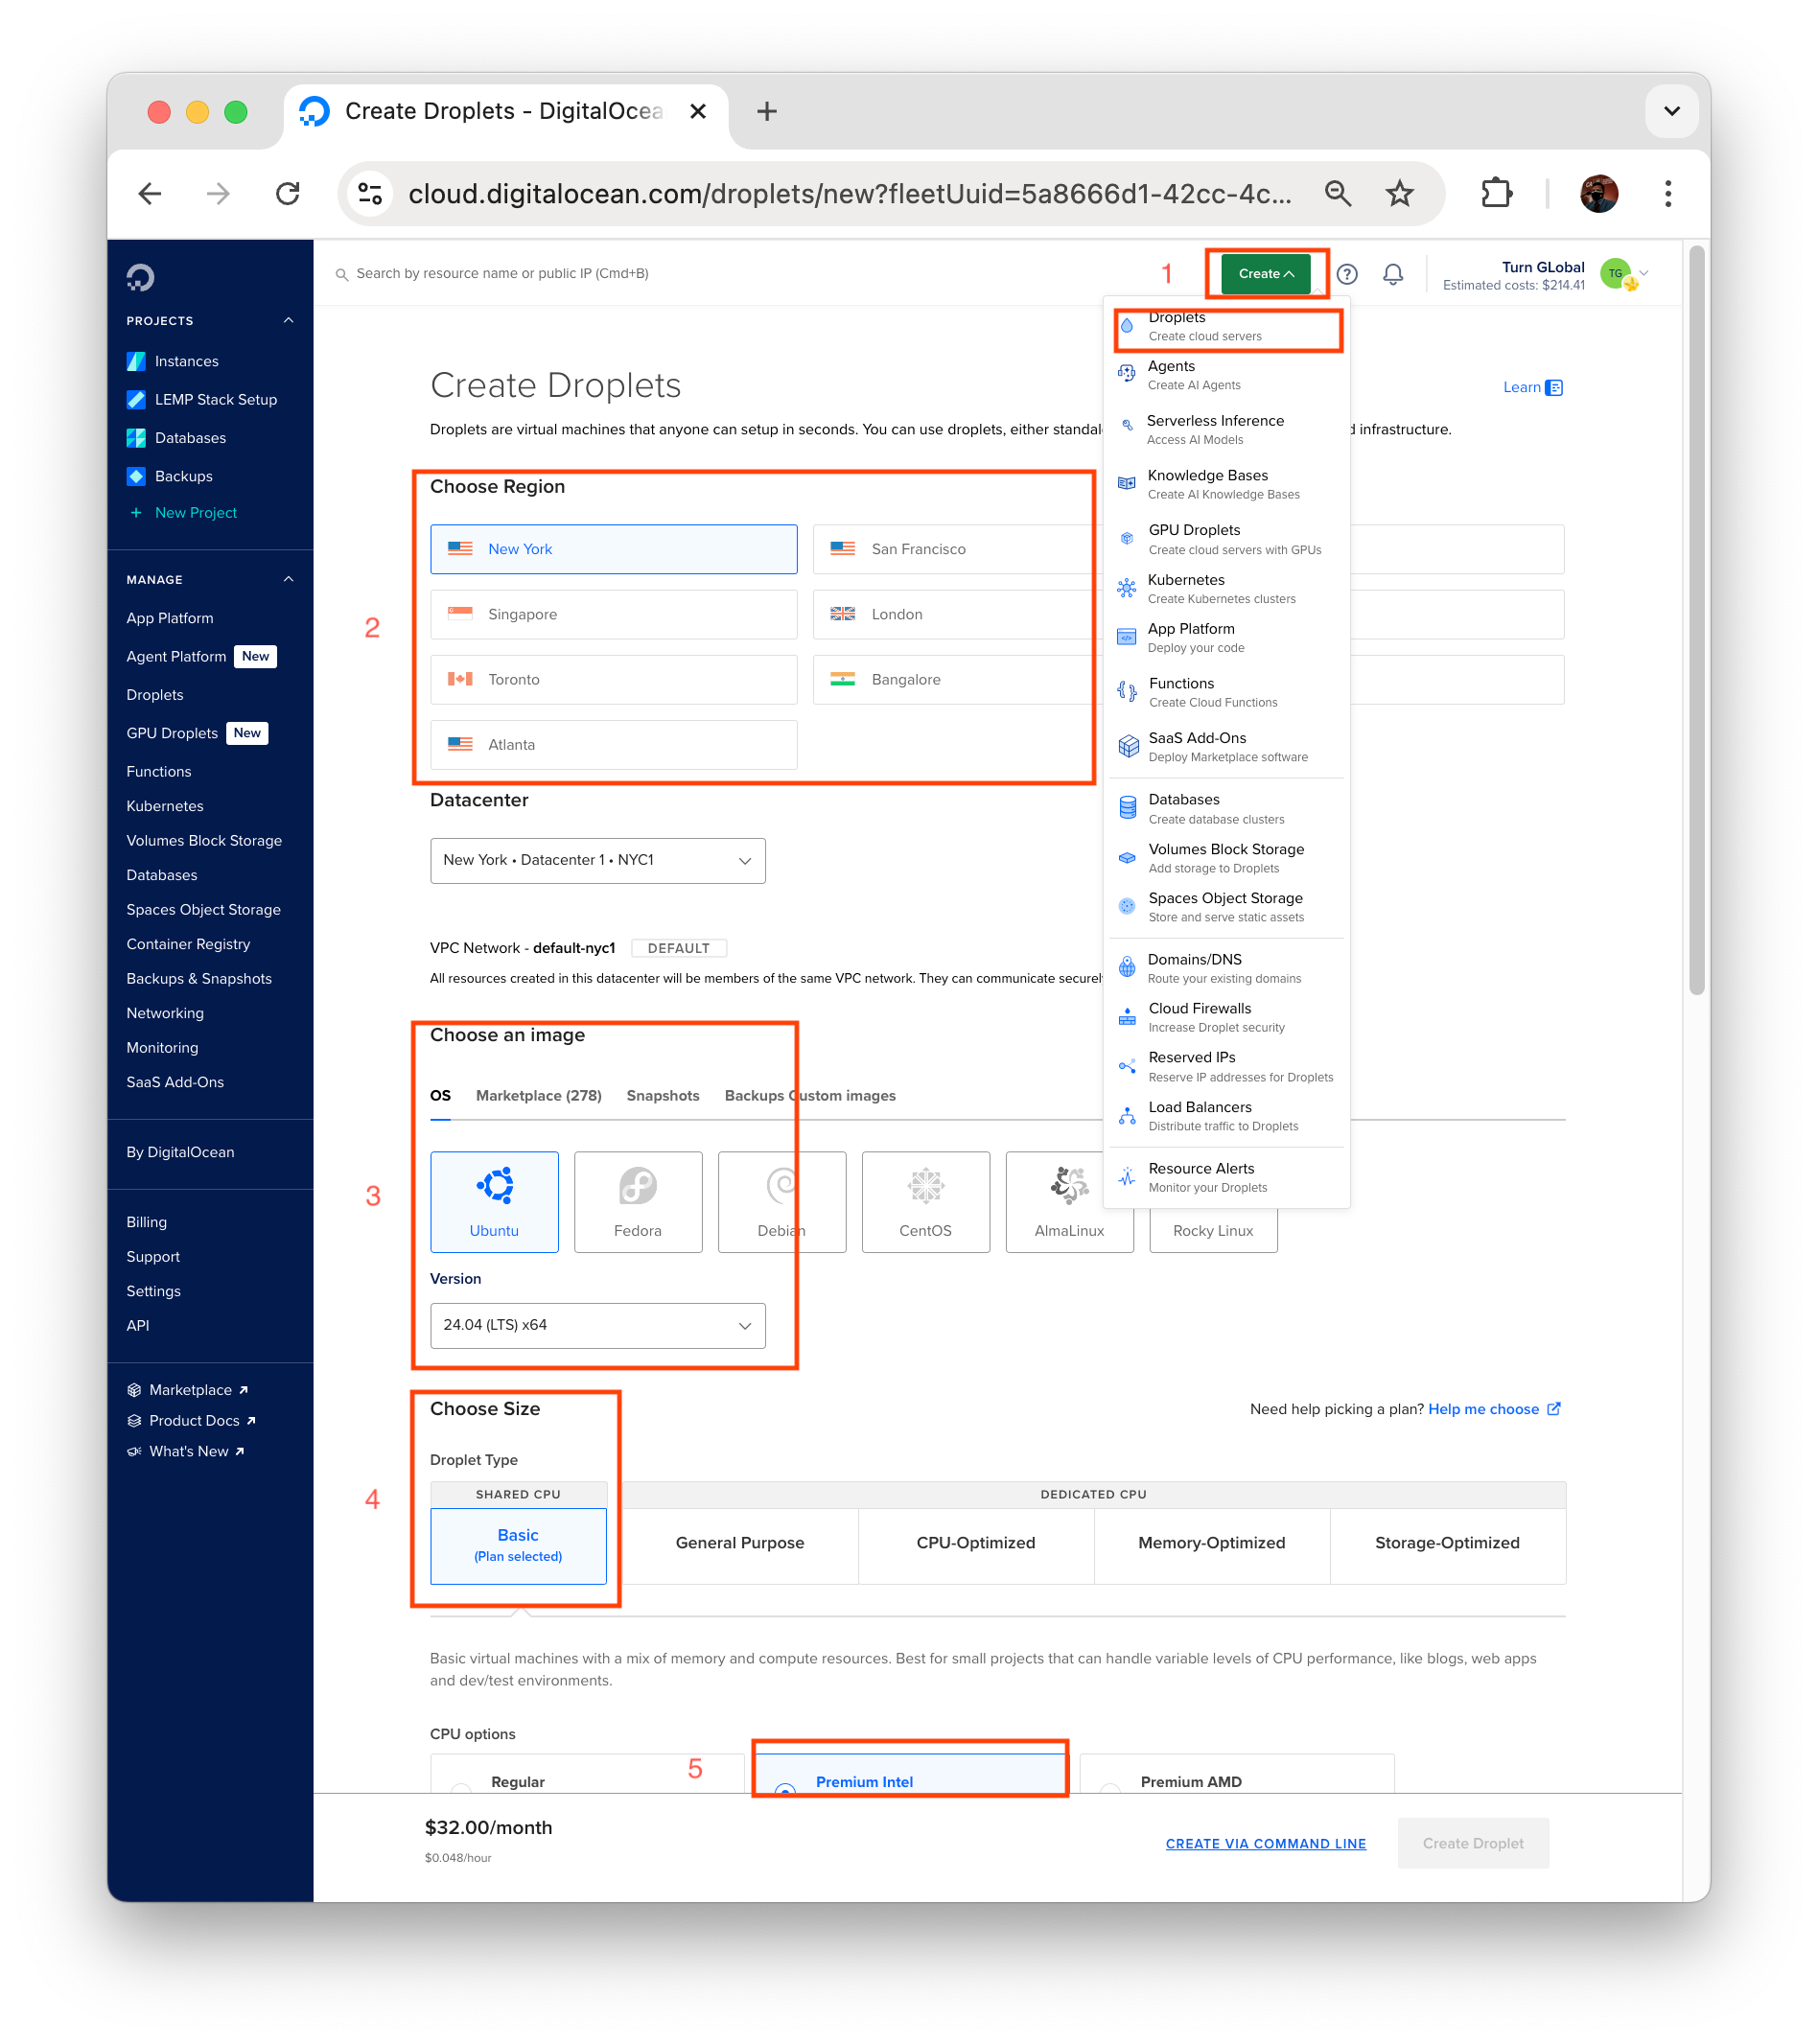
- Open the Create Menu:
Click on the green “Create” button in the top-right corner and select Droplets from the dropdown menu. - Choose a Region
Select the data center closest to your audience (e.g., New York, London, Bangalore). This helps reduce latency and improve load times. - Choose an Operating System
Under the “Choose an image” section, select: Ubuntu Version: 24.04 LTS (x64) - Select a Droplet Size
For most small-to-medium websites and apps, the Basic (Shared CPU) plan is perfect to start with. - Choose CPU Options
You can choose between Premium Intel or Premium AMD processors both offer great performance. - Enable Backups (Optional but Recommended)
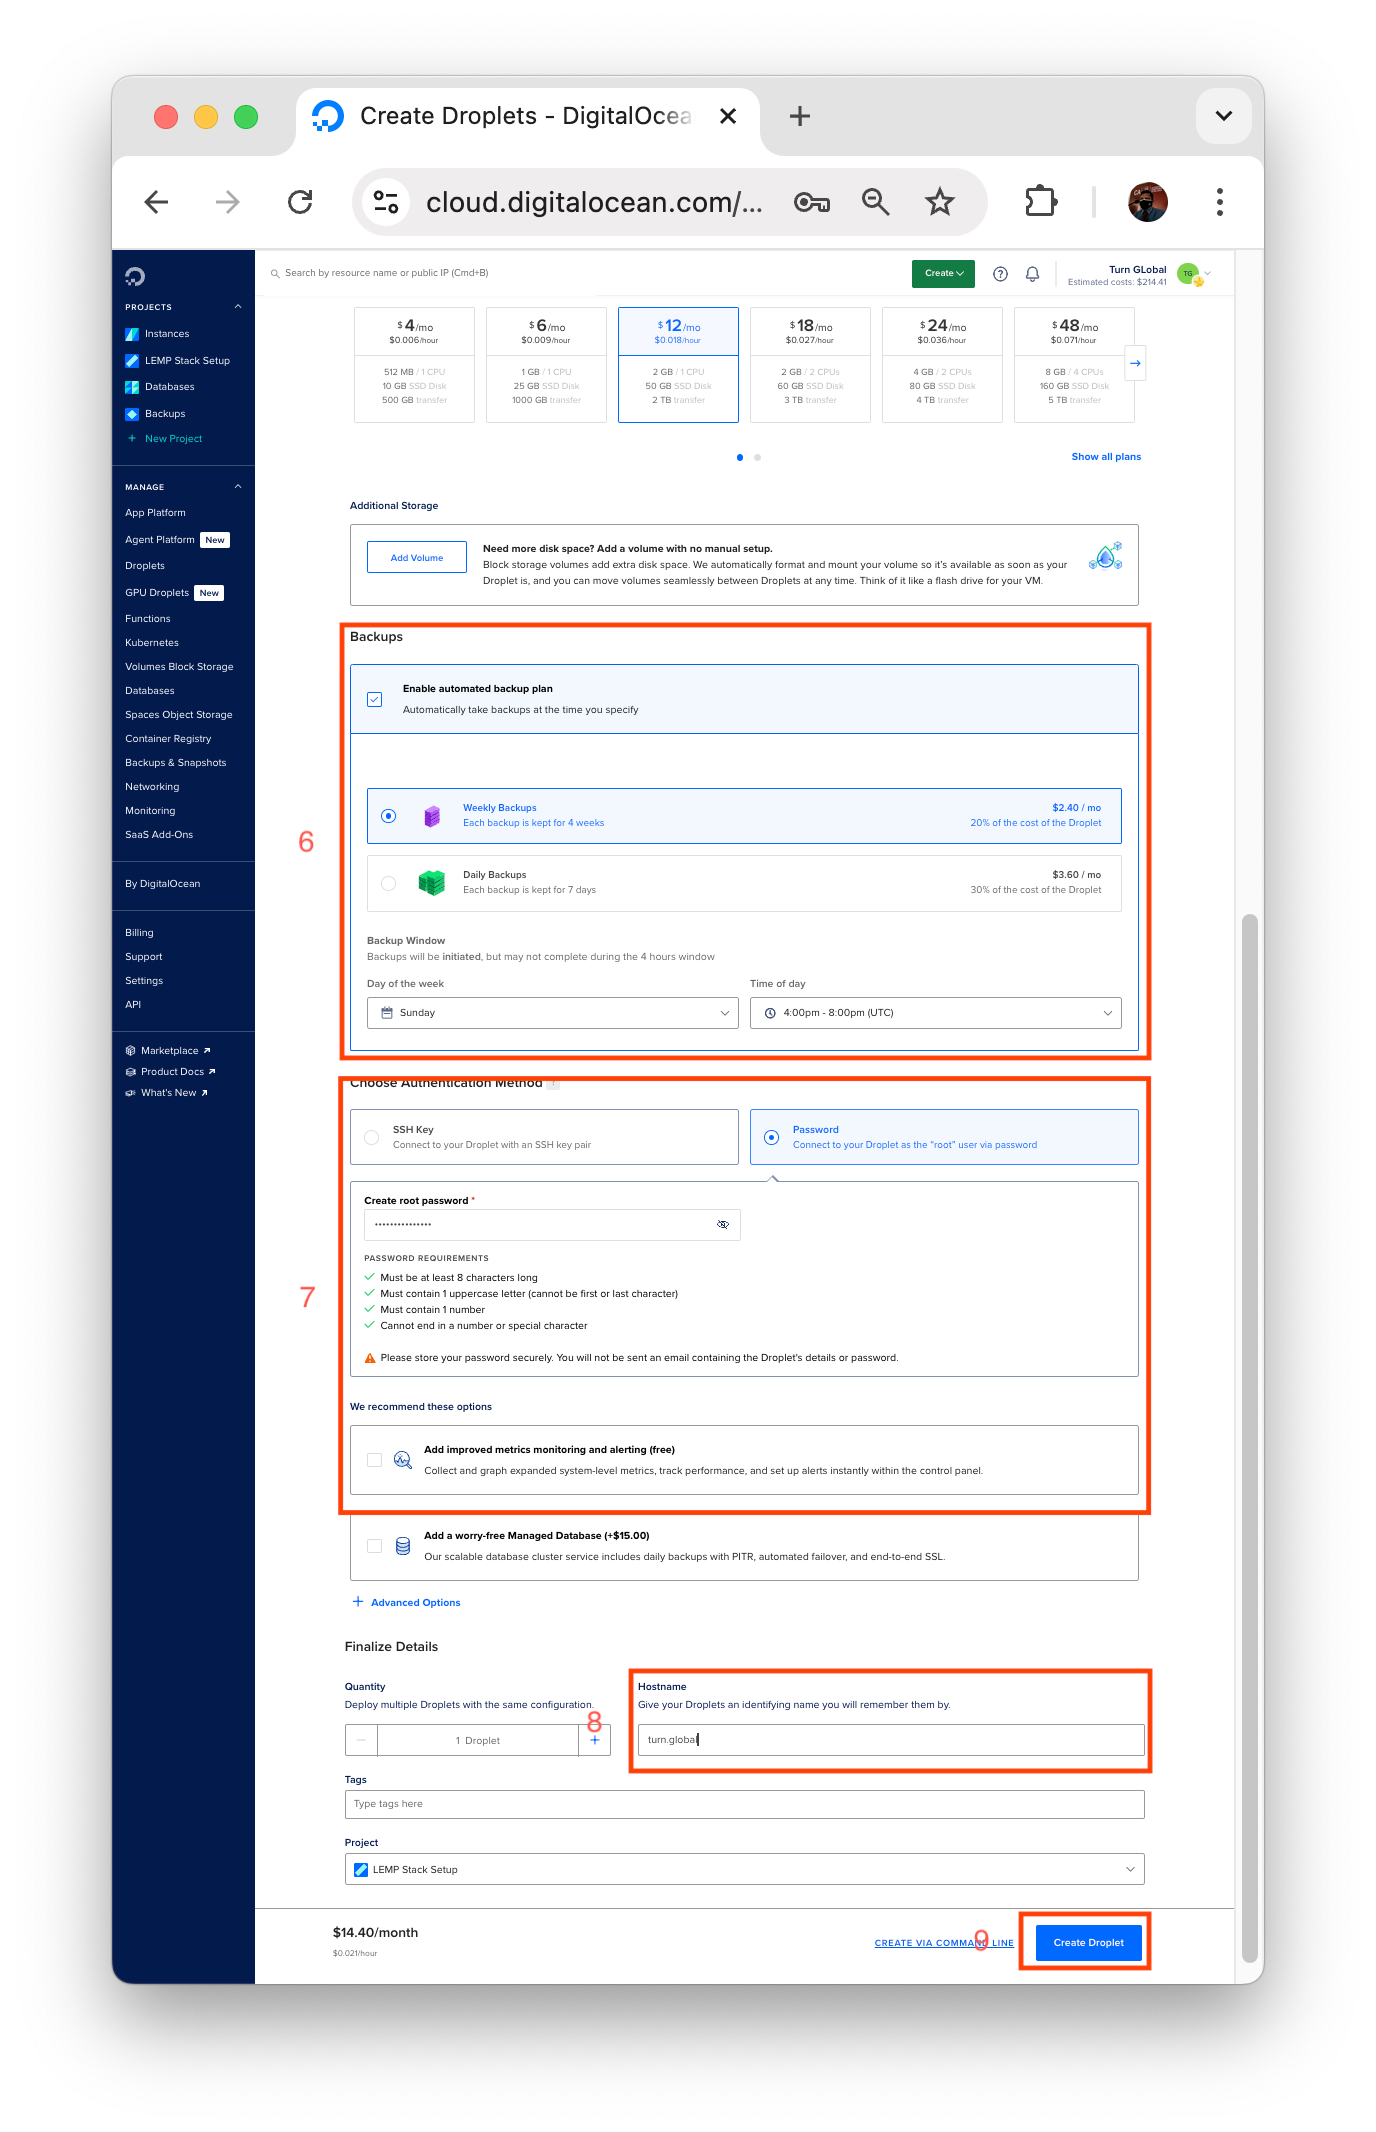
Under the Backups section: Toggle “Enable automated backup plan”. Choose Weekly or Daily Backups depending on your project’s needs. You can also customize the backup window (e.g. every Sunday, 4:00pm–8:00pm UTC).
Weekly backups are a good balance between safety and cost. - Choose an Authentication Method
Under Authentication, you can choose between.
SSH Key: More secure, recommended for long-term use.
Password: Simpler for quick access (must meet complexity rules).
If you're using password authentication: Create a strong password (8+ characters, upper & lower case, number, no special character at the end)
Store it securely. DigitalOcean won’t send it by email. - Set a Hostname
This is the name your droplet will appear as in the ubuntu terminal. Example: turn.global, laravel-prod-01, or wp-site-01. Give it something descriptive so you can identify it later. - Create Your Droplet At the bottom of the screen, you’ll find two buttons: Click "Create Droplet" to launch your server. Within about few seconds, your droplet will be deployed, and you’ll see its IP address to begin configuration.
VPS Setup Instructions
Step 1: System Update and Upgrade
Before installing anything, make sure your system is up to date. But first you need to log into your VPS.
If you're using DigitalOcean
DigitalOcean offers a convenient in-browser terminal right from their dashboard:
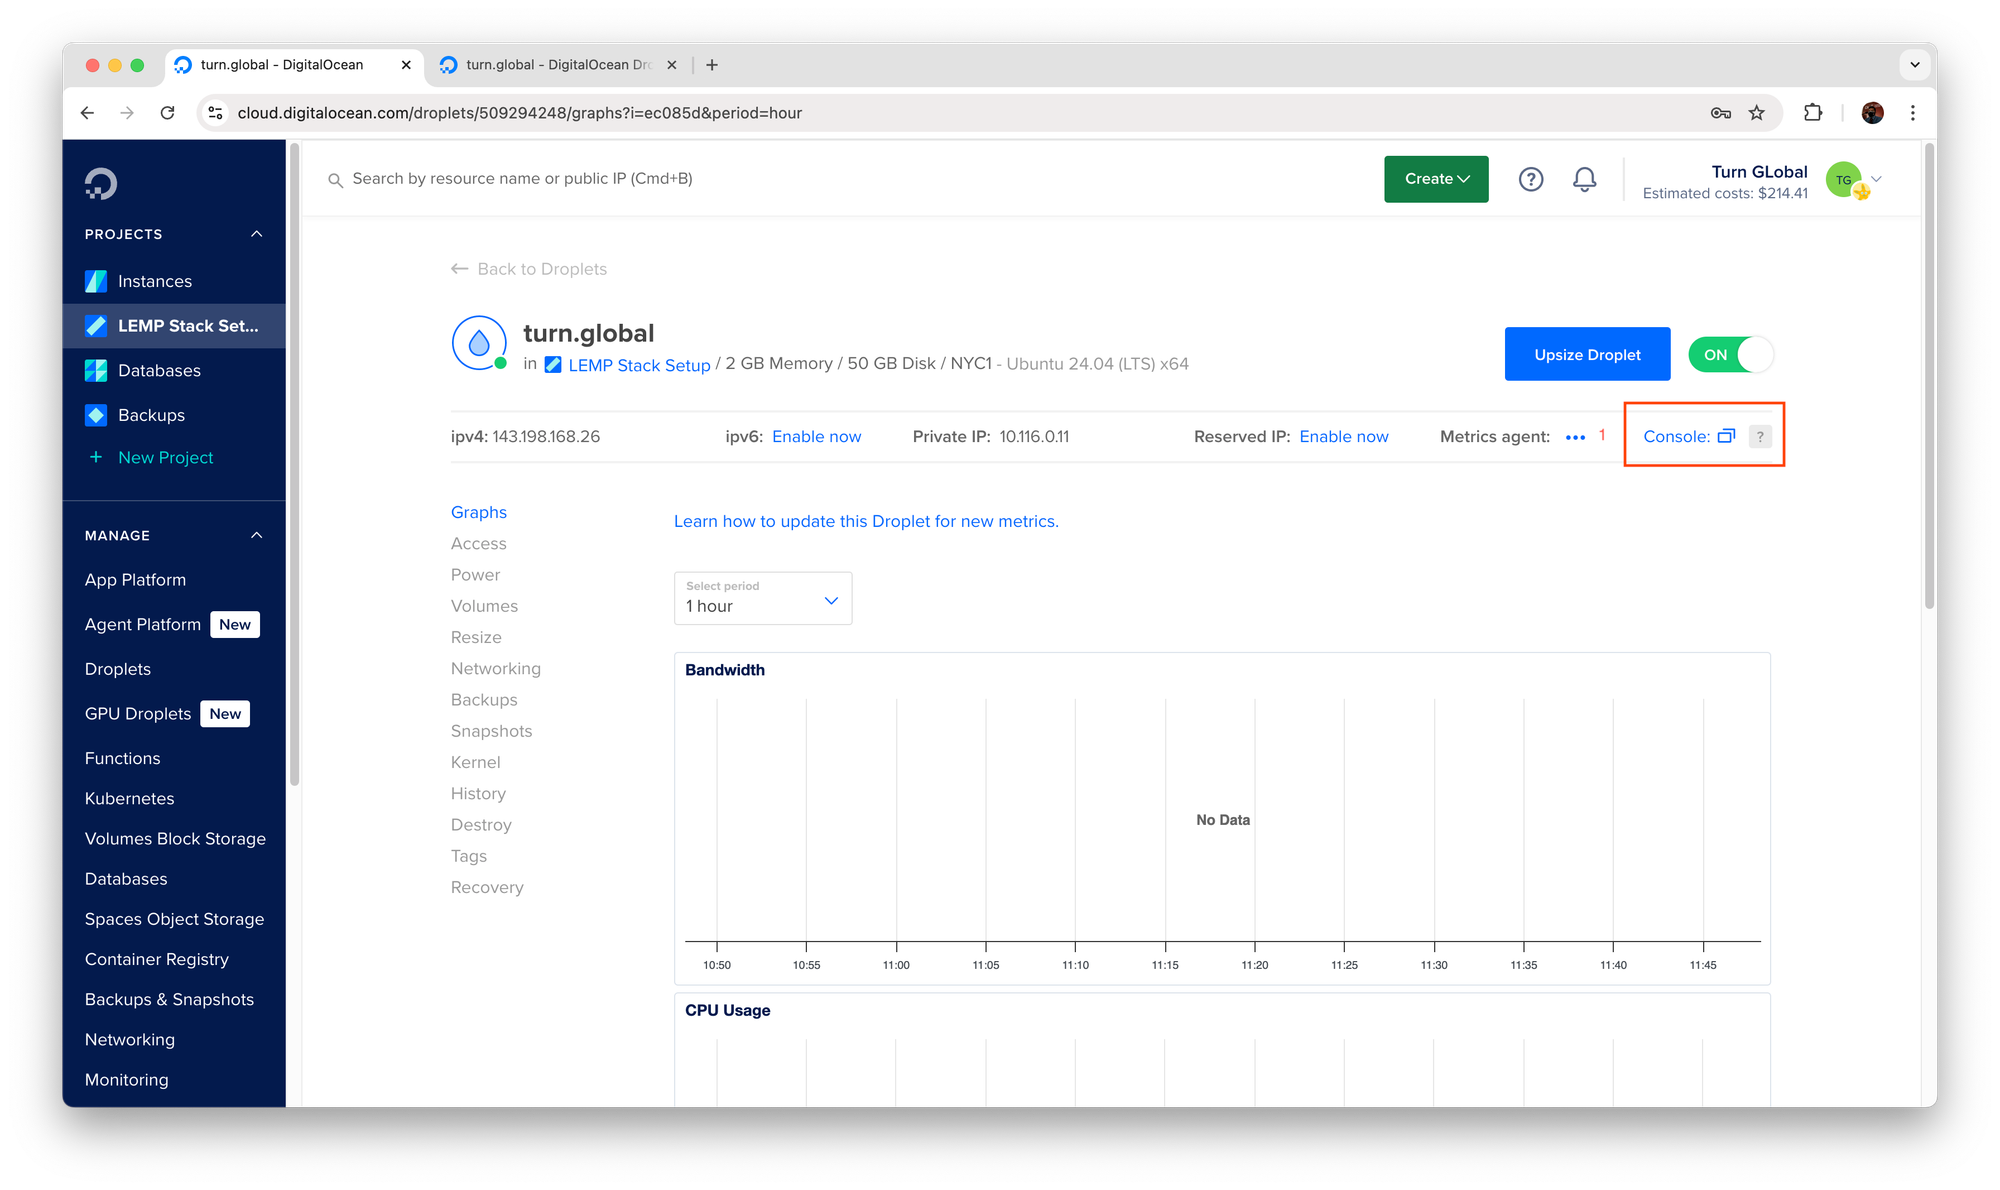
After creating your droplet, it will appear in your project dashboard as a listed VPS. Simply click on the droplet name (e.g. turn.global) to open its management panel. From there, you can access the VPS directly by
- clicking the “Console” link located at the top right.
This launches a browser-based terminal window where you can log in using the root credentials you set earlier. It's a quick and easy way to get inside your server without needing to use external tools like PuTTY or Terminal.
Other VPS Providers
If your hosting provider offers a web-based terminal, use it the same way. If not, use one of the following methods:
On Windows (using PuTTY)
- Download PuTTY: https://www.chiark.greenend.org.uk/~sgtatham/putty/latest.html
- Open PuTTY and enter your VPS IP in the Host Name field
- Connect using SSH (default port is
22) - Login as
rootor your sudo-enabled user
On macOS or Linux
Use your system terminal:
Accept the prompt to continue, then enter your password.
Note: Ubuntu VPS has no graphical interface (GUI). Everything is done through the terminal.
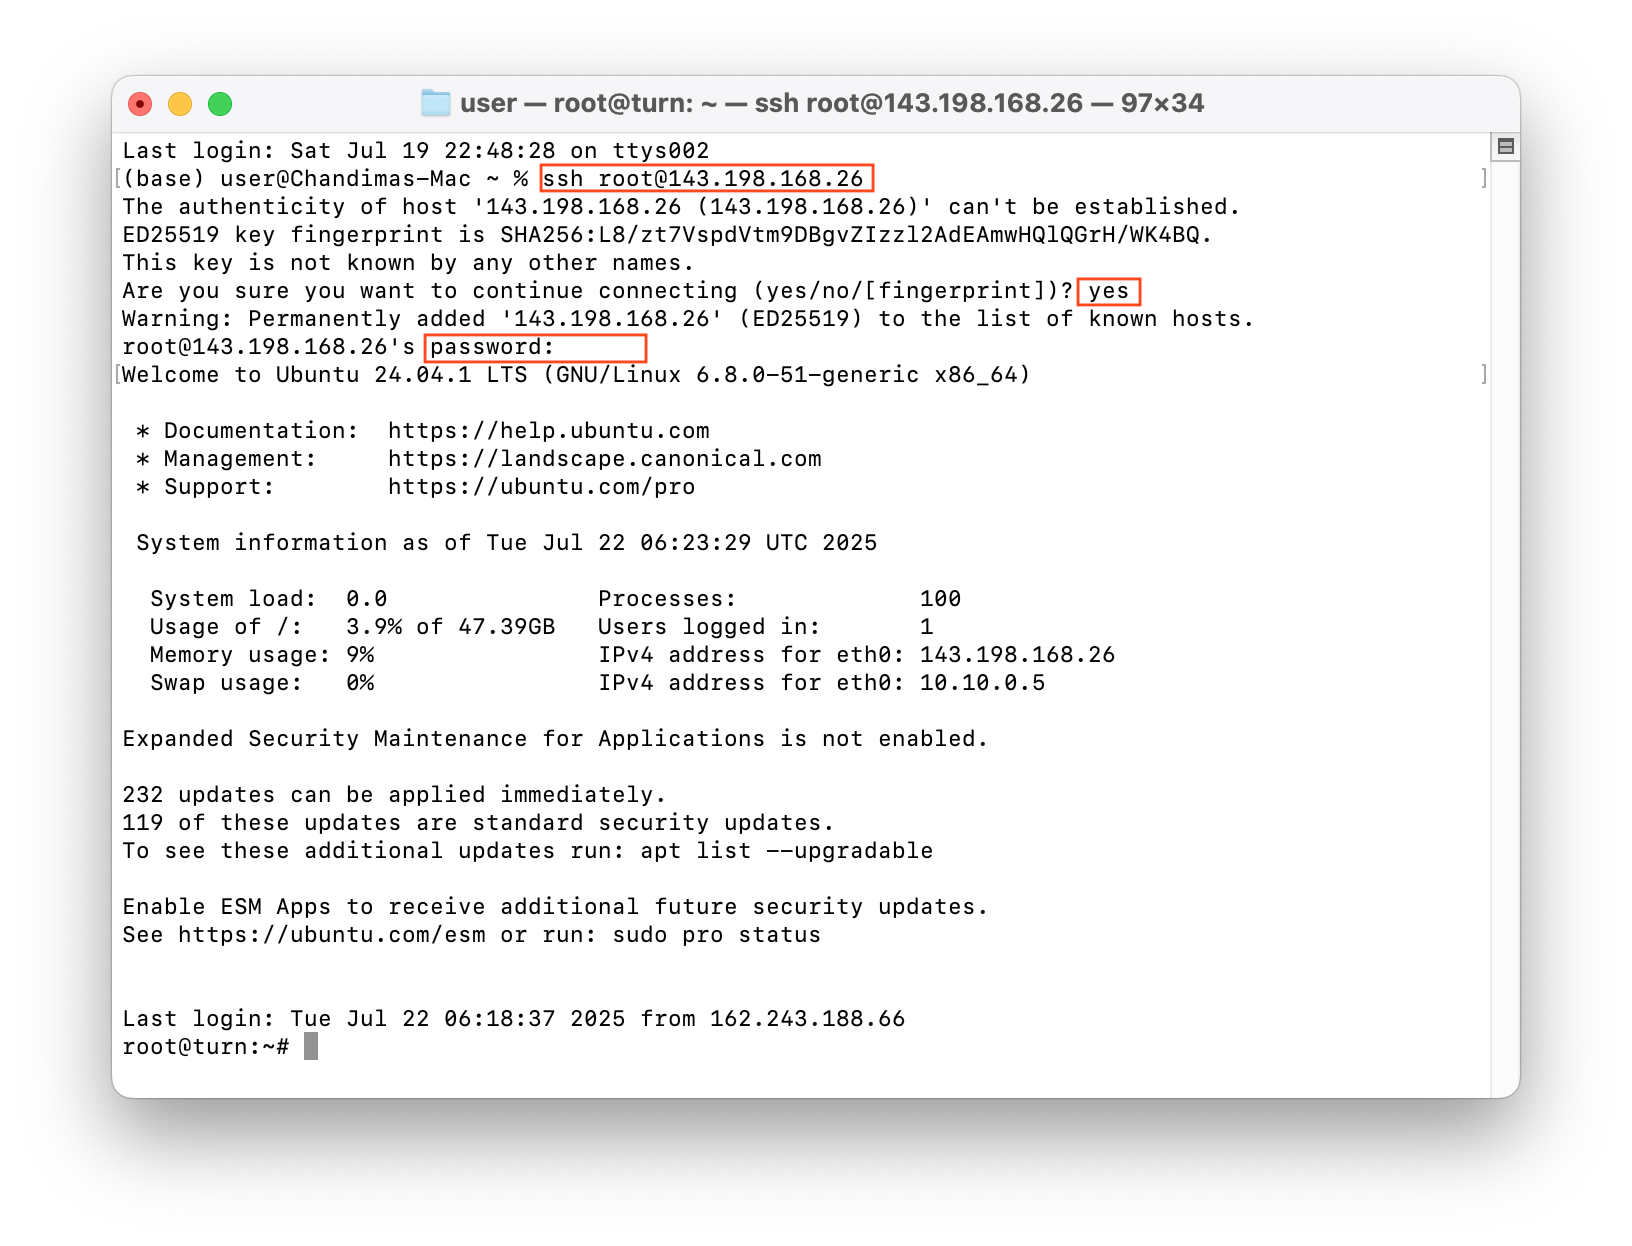
In this example, the IP address is 143.198.168.26. When prompted, type yes to confirm the fingerprint, then enter your password (it won’t be visible as you type). Once logged in, you’ll see a welcome message confirming the server's hostname (turn), OS version (Ubuntu 24.04 LTS), and system stats like memory, disk, and load usage. This confirms that you now have full root access to your VPS ready to begin the LEMP stack setup and deploy your application.
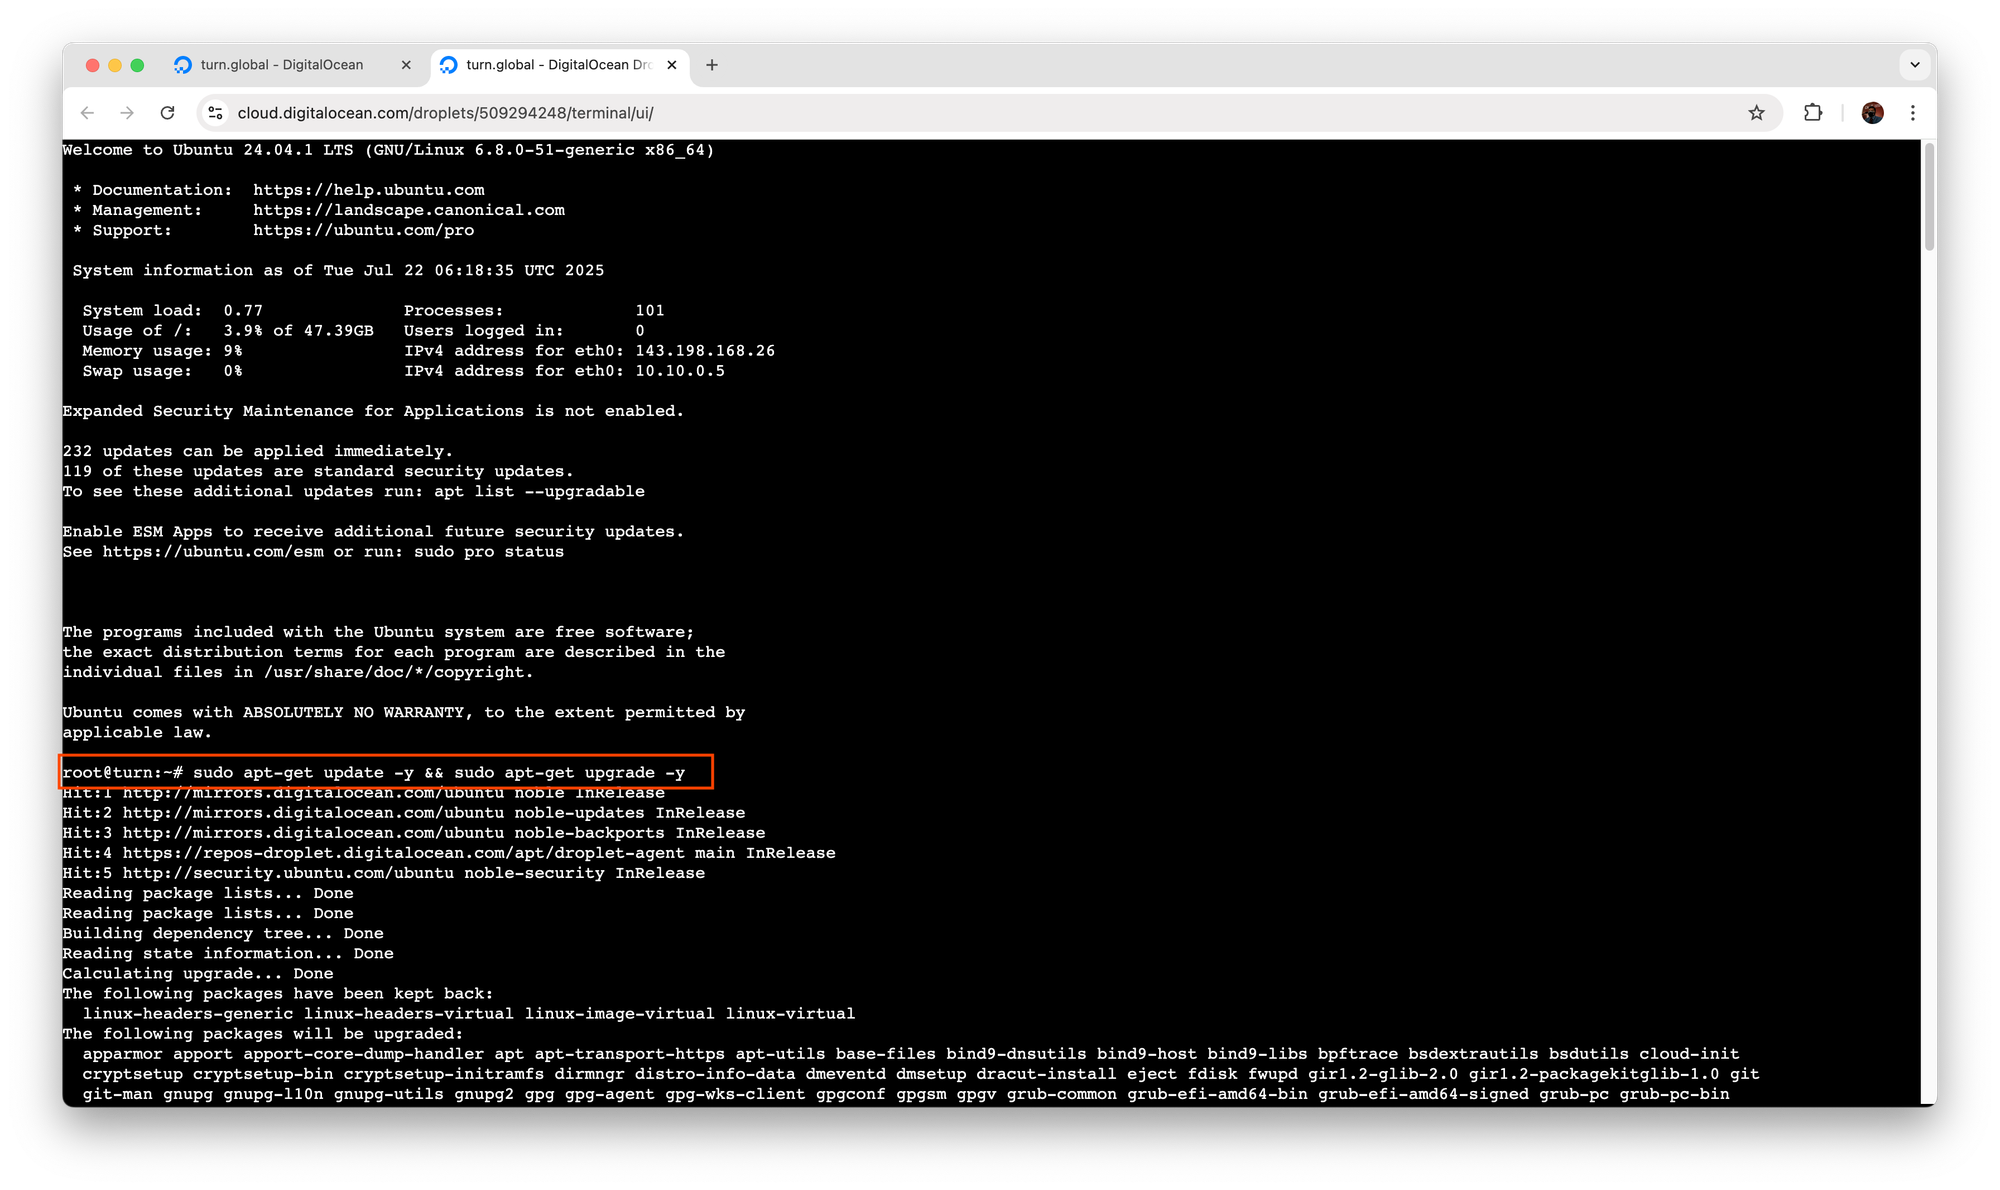
Update and Upgrade System Packages
Once logged in, run the following to make sure all packages are up to date:
This ensures your server starts with the latest security patches and software updates.
Handling Configuration File Prompts During Updates
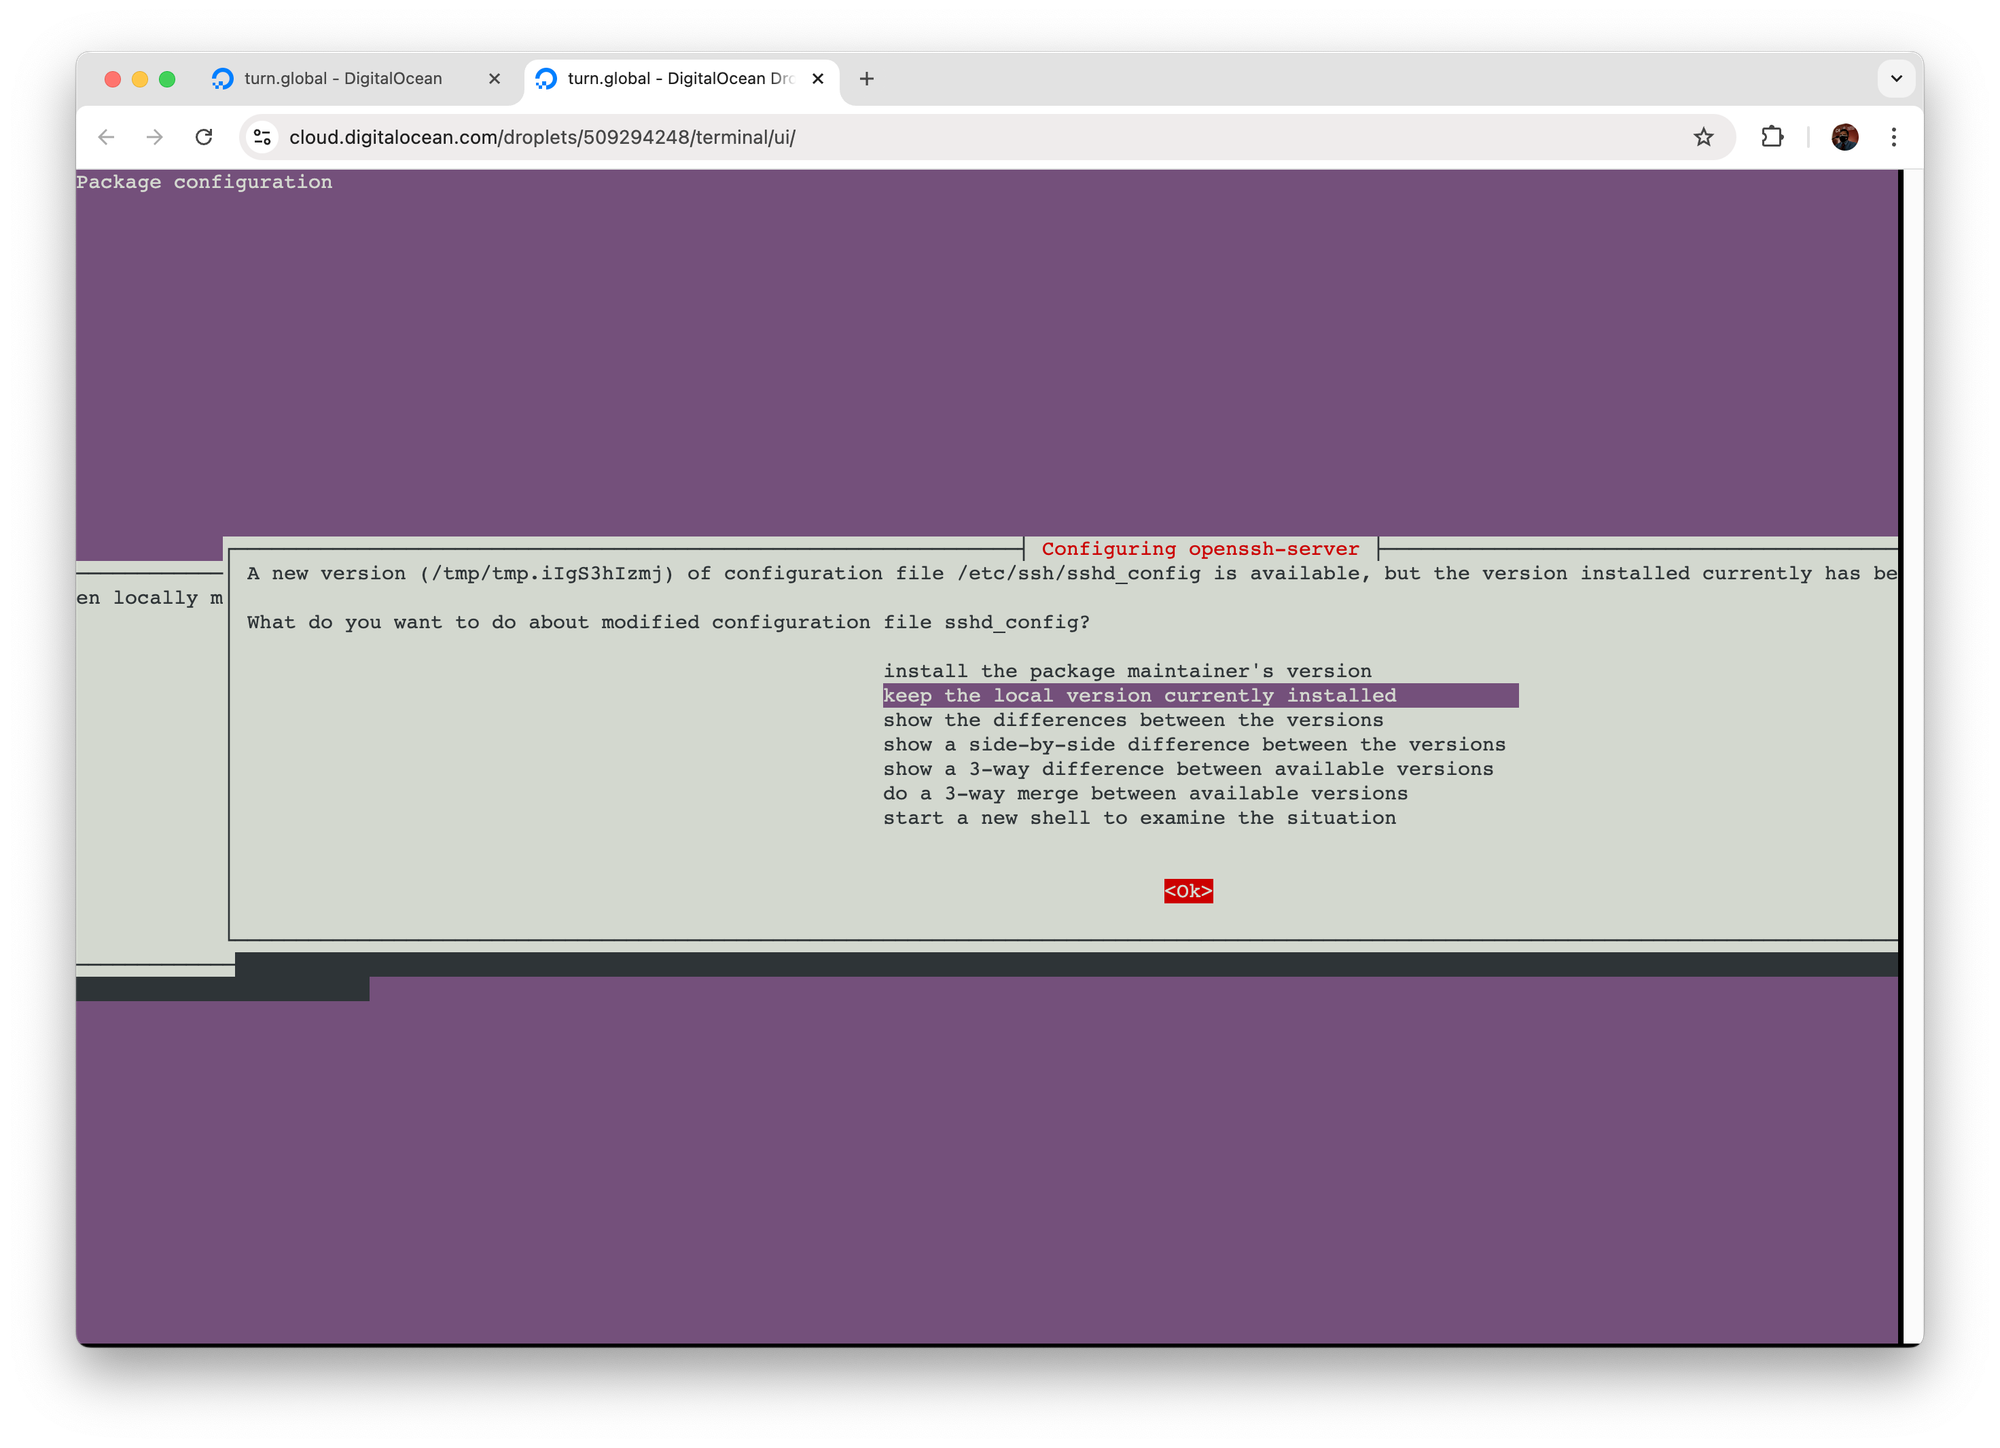
Sometimes during apt-get upgrade, you’ll see prompts like this asking what to do with a modified configuration file (in this case, /etc/ssh/sshd_config).
If you're unsure what to do: it's safest to keep the default highlighted option (which is usually “keep the local version currently installed”).
To continue:
- Press the
Tabkey to highlight<OK> - Then press the
EnterorSpacebarto proceed
This avoids accidentally overwriting custom system configs, especially for SSH or networking.
You may see similar prompts during other package upgrades. Just follow the same approach unless you know exactly what needs changing.
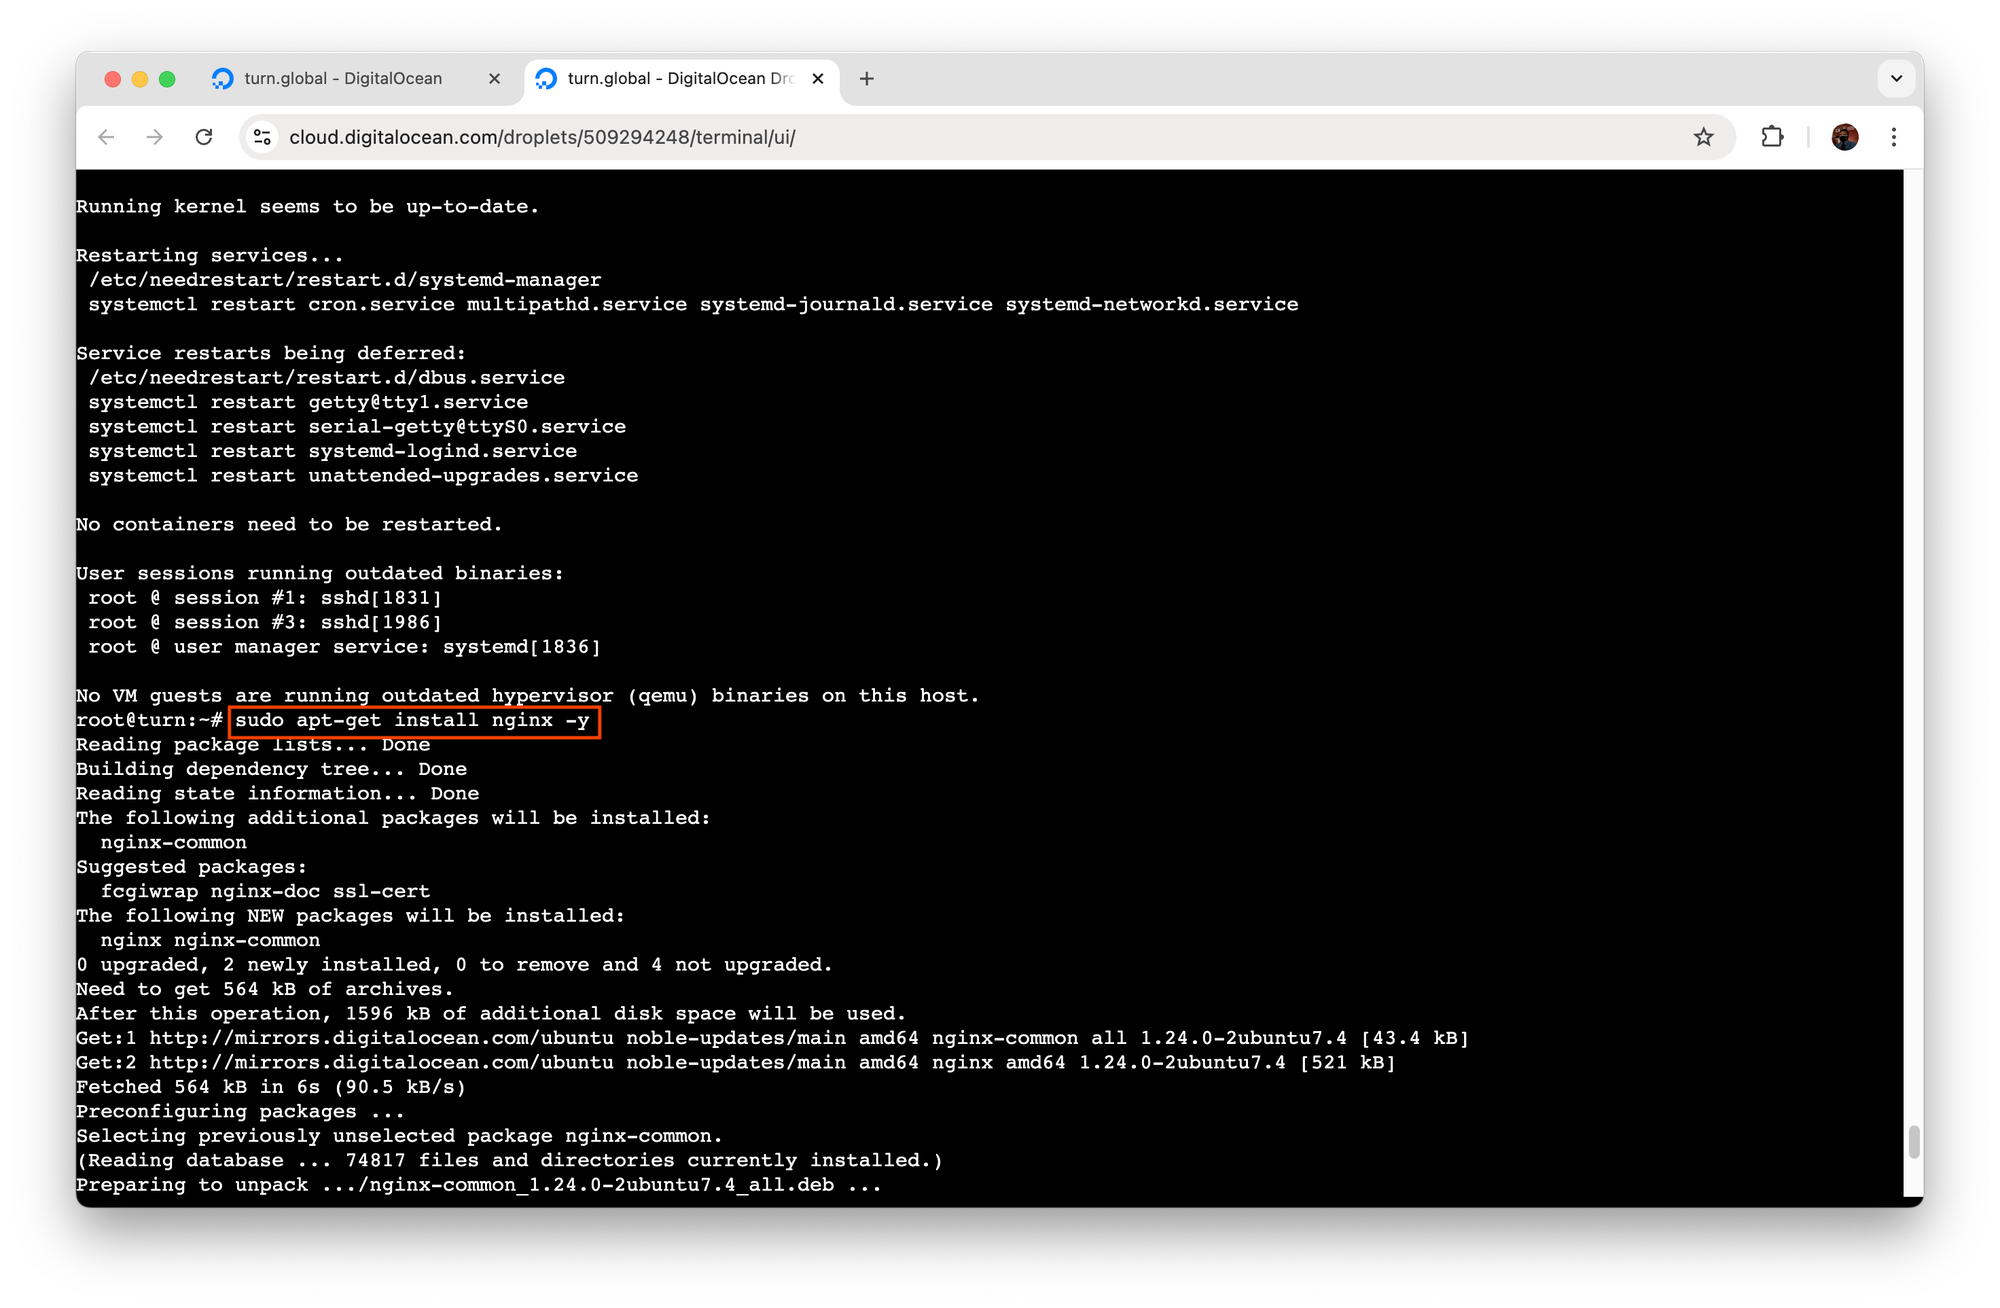
Step 2: Install Nginx Web Server
Nginx is a high-performance web server that's perfect for hosting PHP applications like WordPress and Laravel.
Start by installing Nginx:
After installation, start and enable Nginx:
sudo systemctl enable nginx
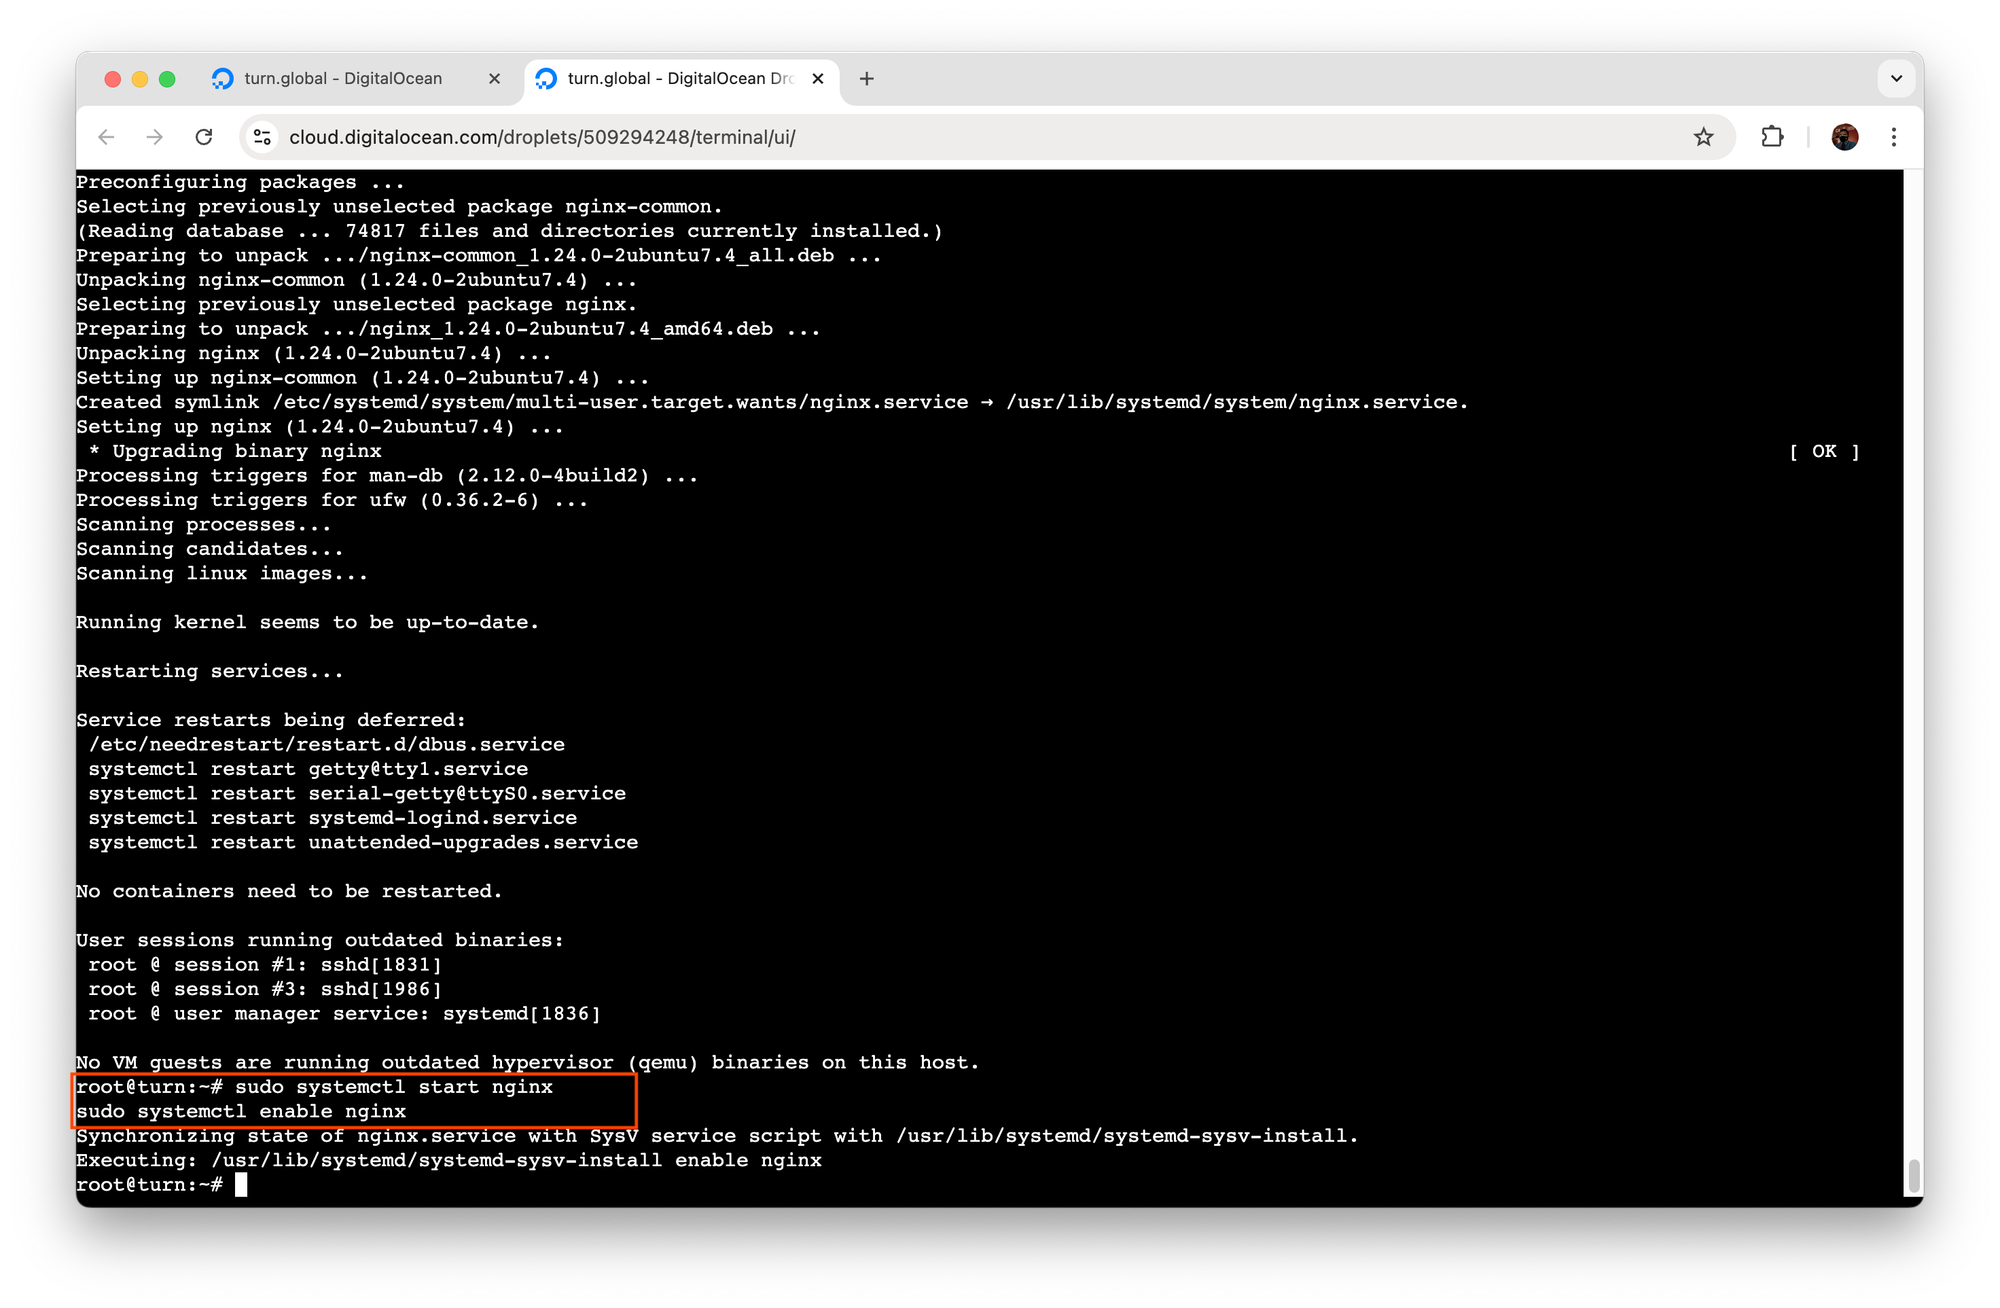
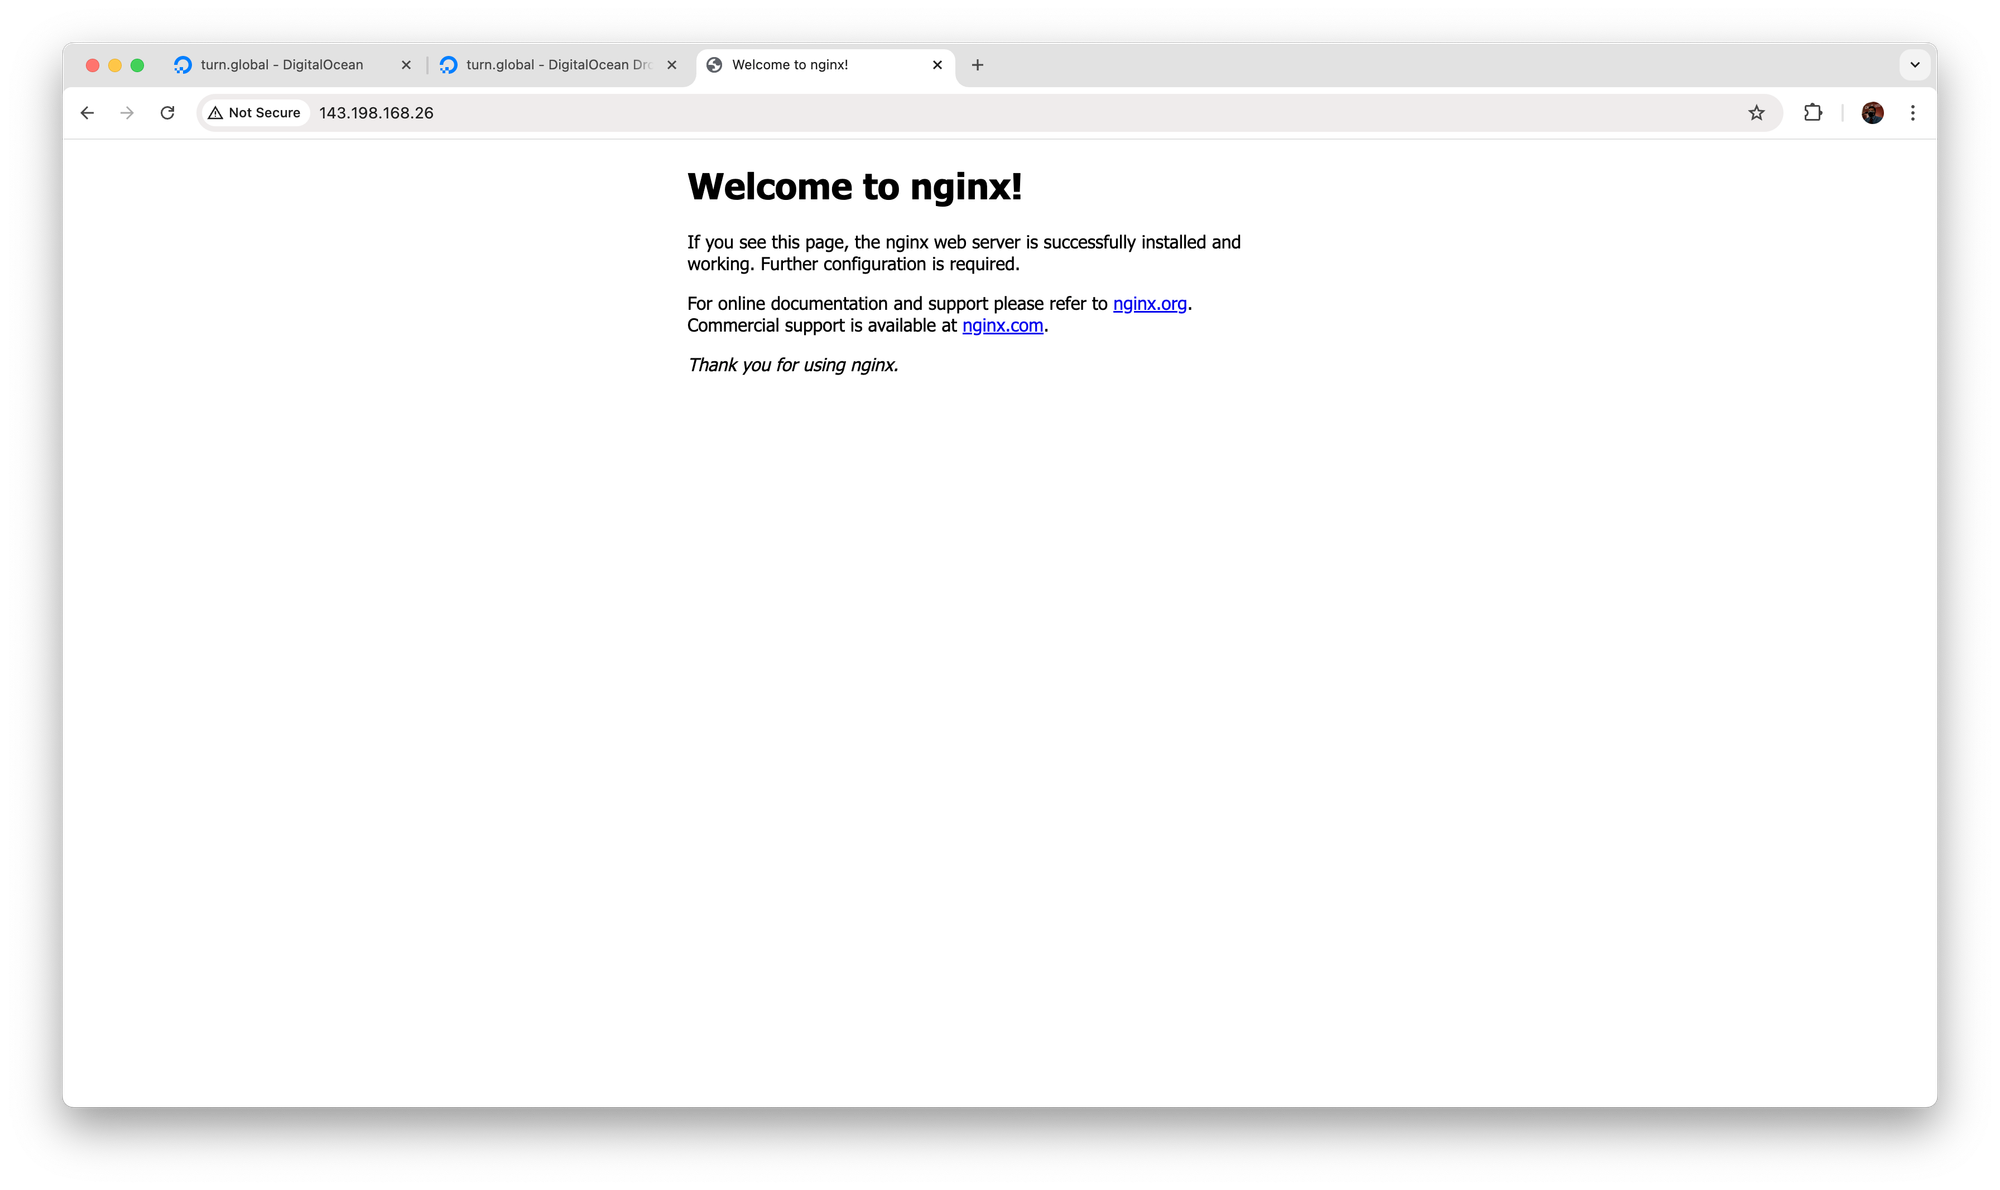
You can check if it’s working by visiting your server IP in a browser.
Strengthen Nginx Security
Once installed, make the following changes to enhance security and performance.
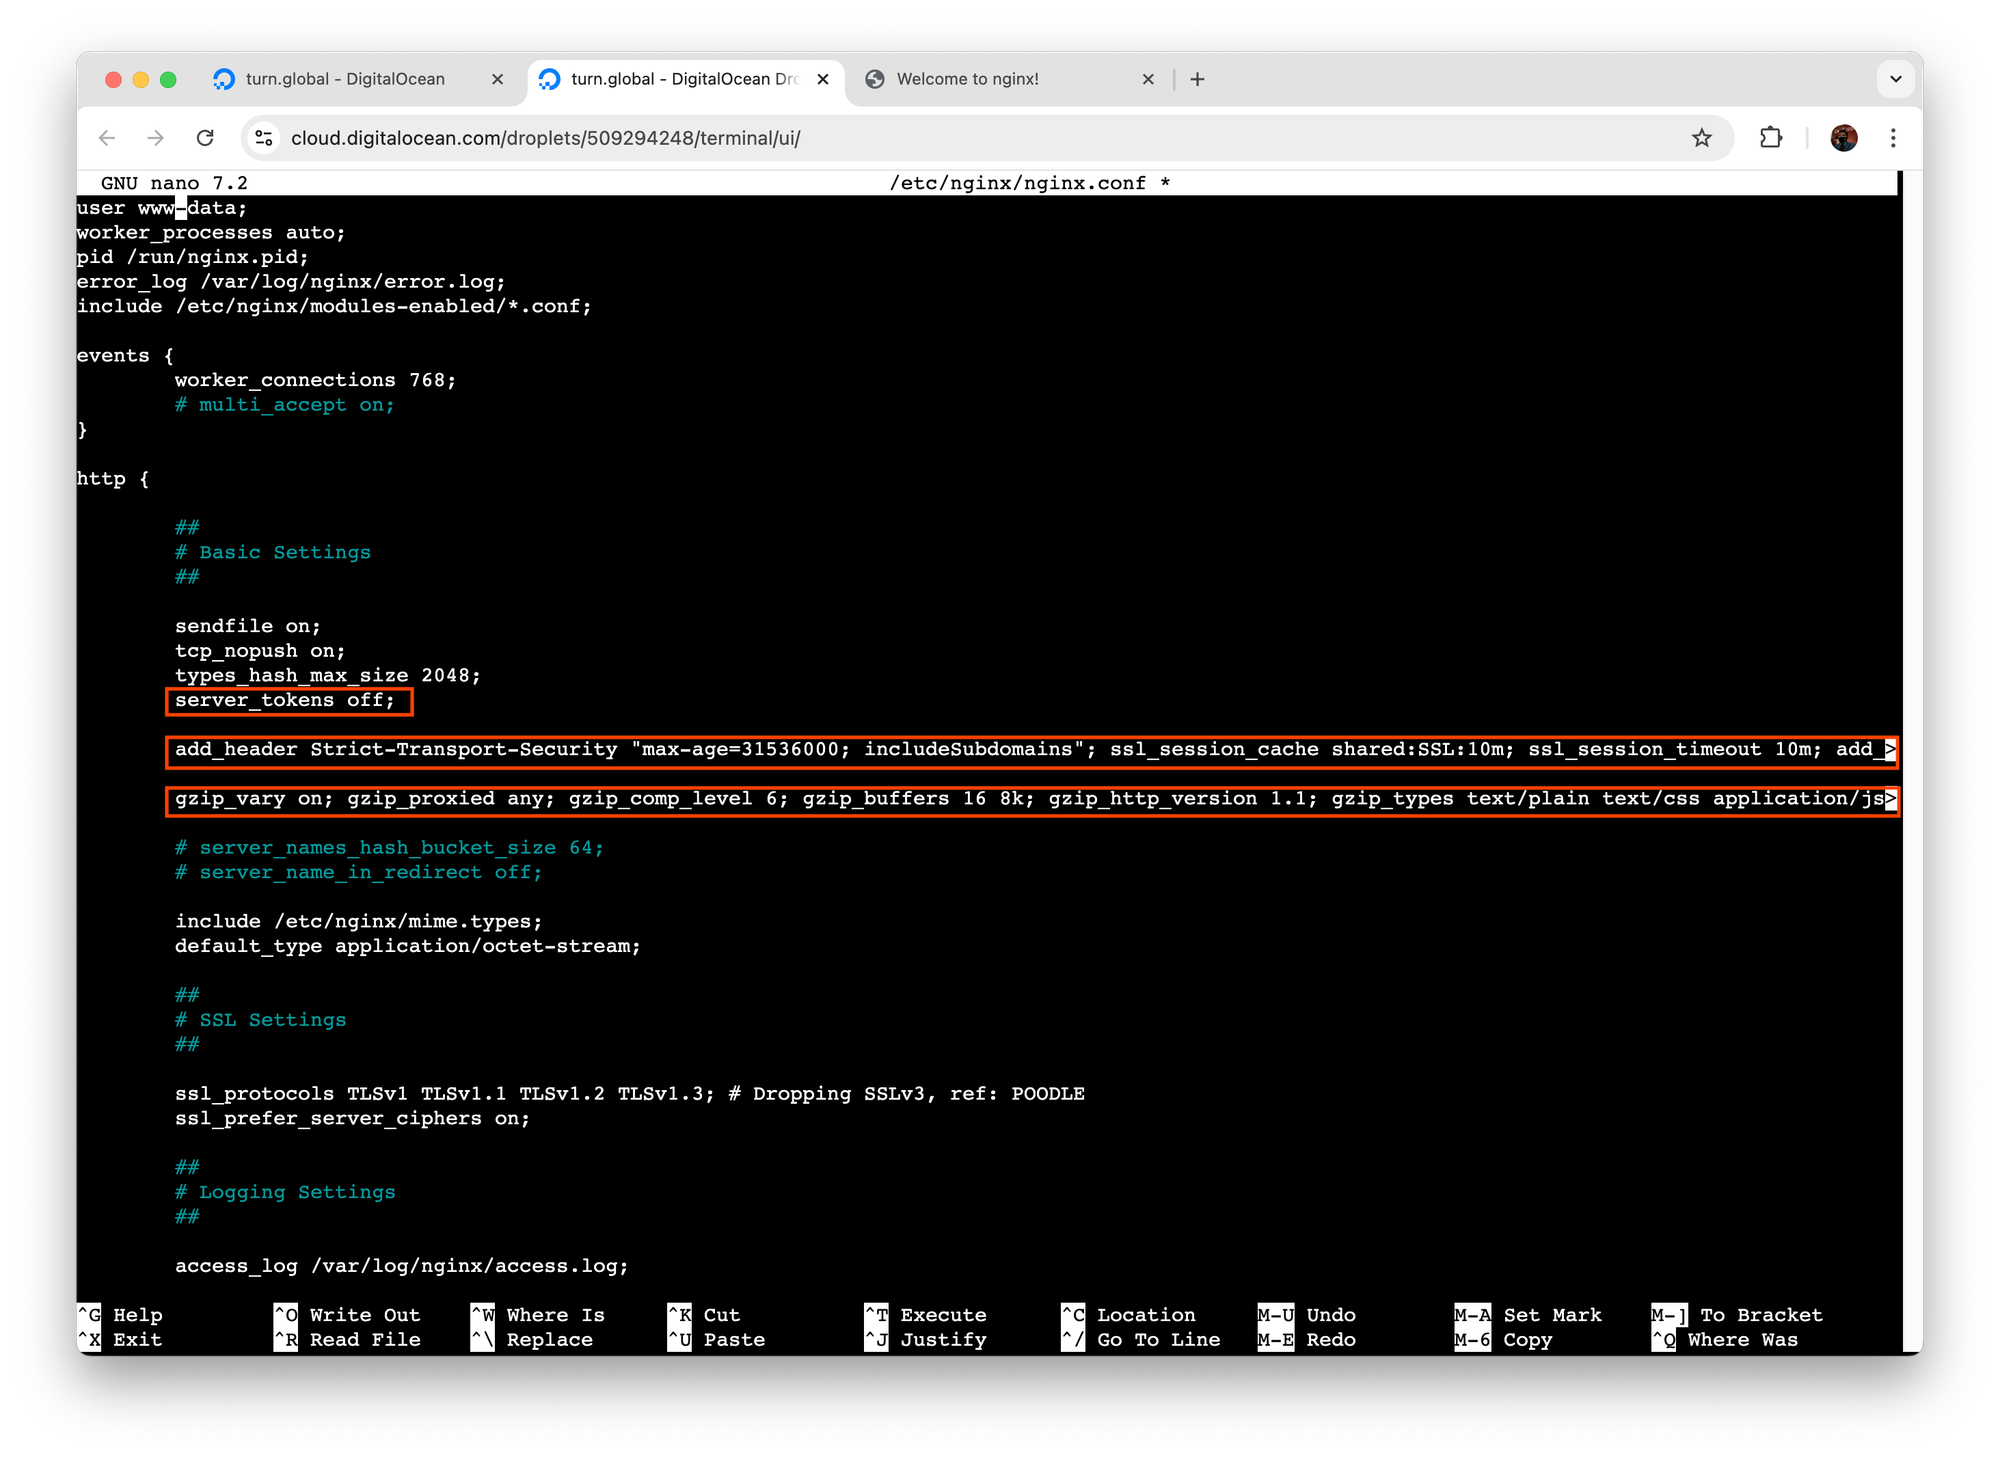
Edit the Main Nginx Config File
Open the Nginx config:
Find and uncomment this line to hide Nginx version info:
Then add the following security headers and gzip compression settings inside the http block:
Save and Exit
When you're done editing:
- Press
Ctrl + Oto save - Press
Enterto confirm - Press
Ctrl + Xto exit
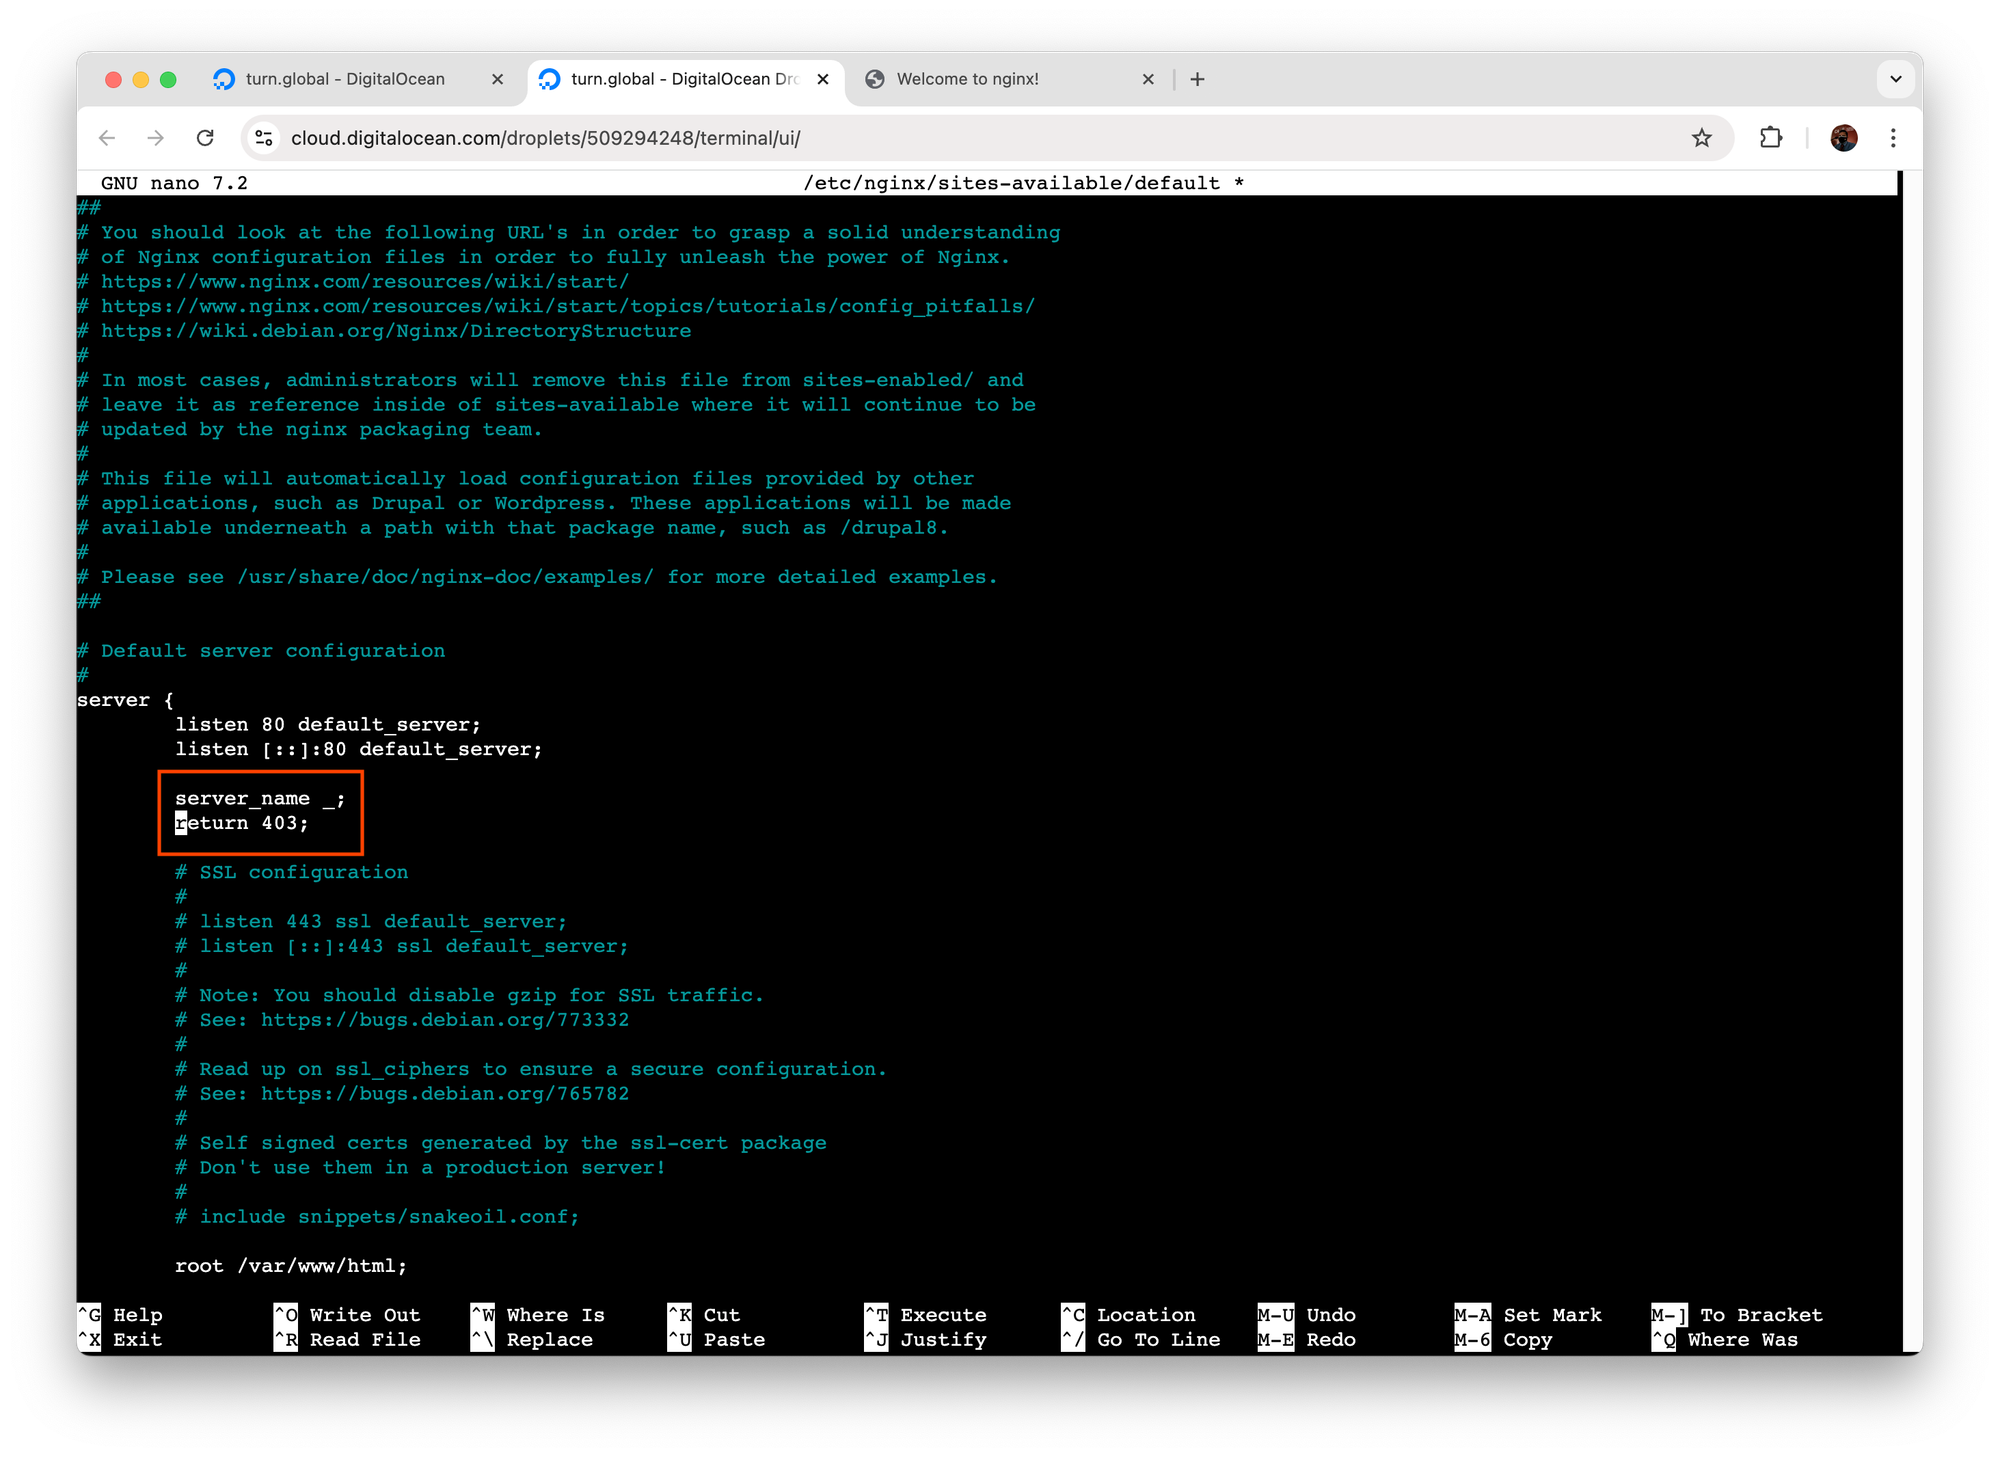
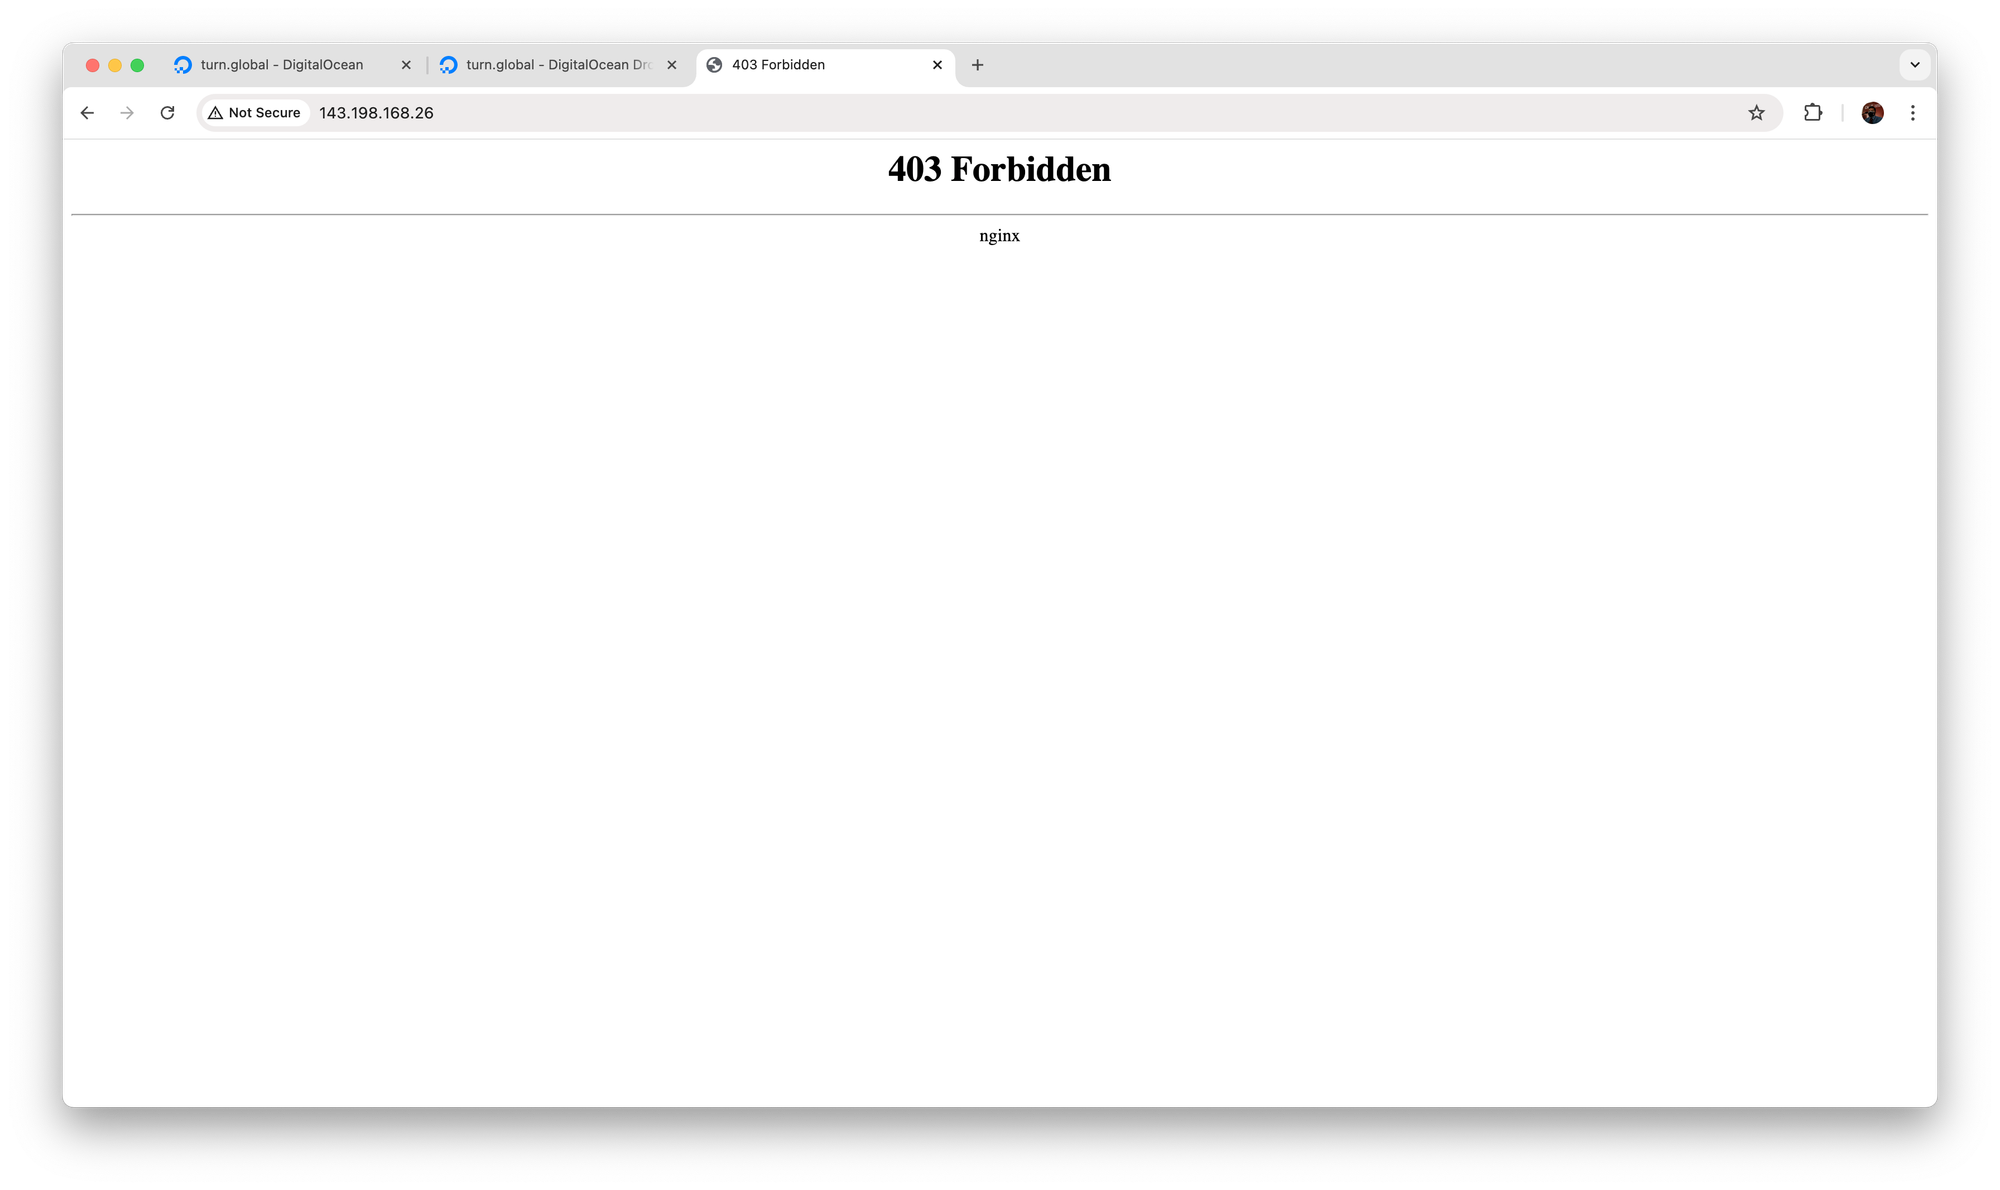
Harden the Default Site
Next, disable the default Nginx site to reduce attack surface:
Add the content with:
server_name _;
return 403;
}
This blocks unwanted access attempts on IP-based requests.
Save and Exit
When you're done editing:
- Press
Ctrl + Oto save - Press
Enterto confirm - Press
Ctrl + Xto exit
Test and Restart Nginx
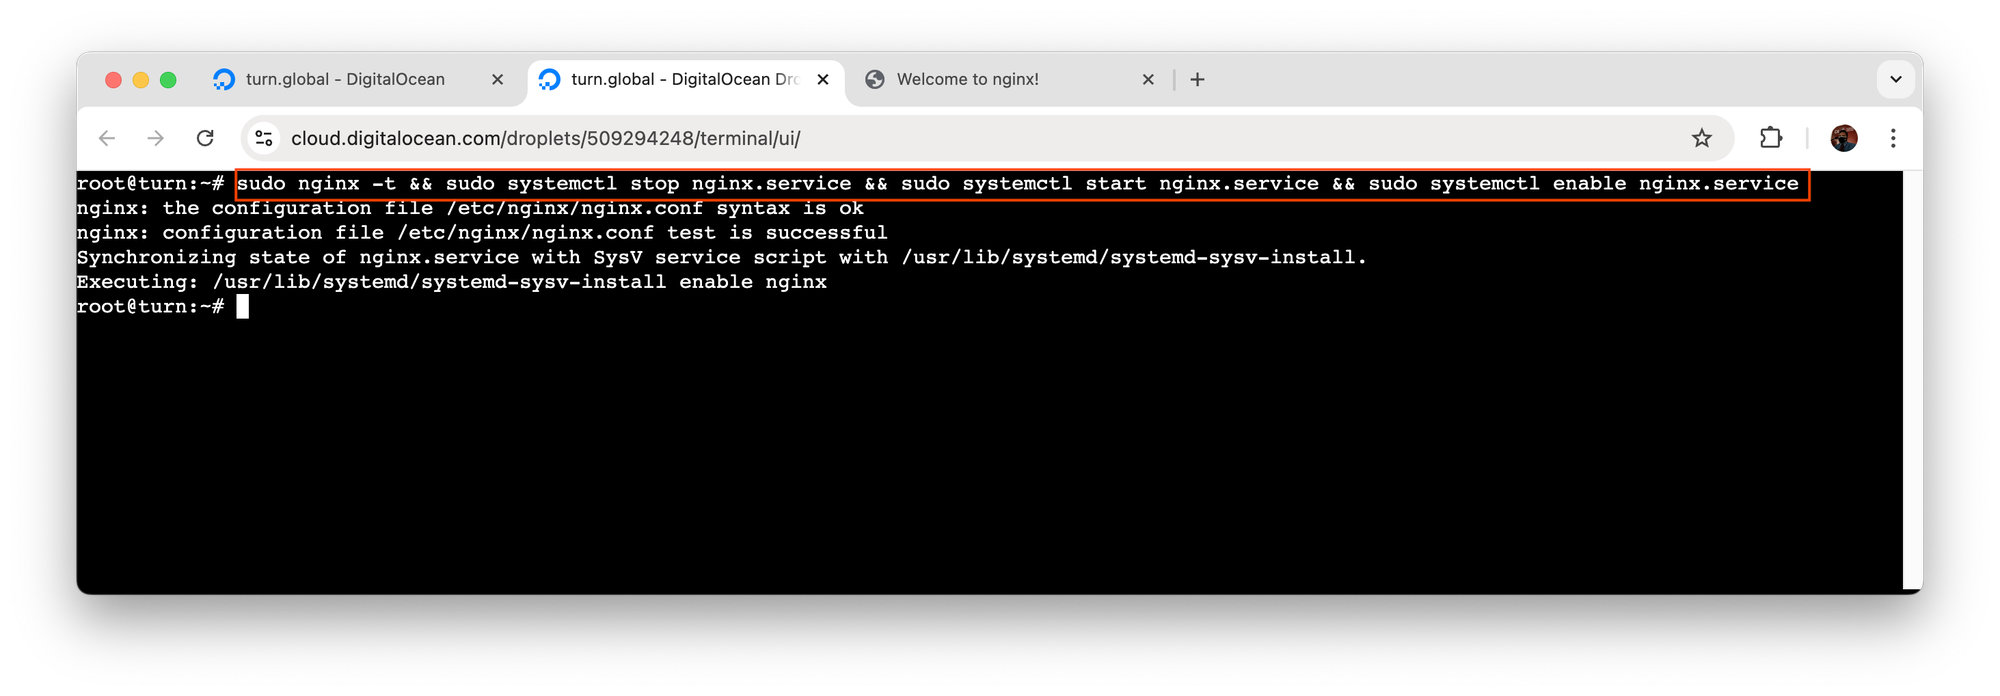
Testing and restarting Nginx configuration using sudo nginx -t to verify syntax, followed by stopping, starting, and enabling the Nginx service with systemctl commands. This confirms Nginx is properly configured and will auto-start on reboot.
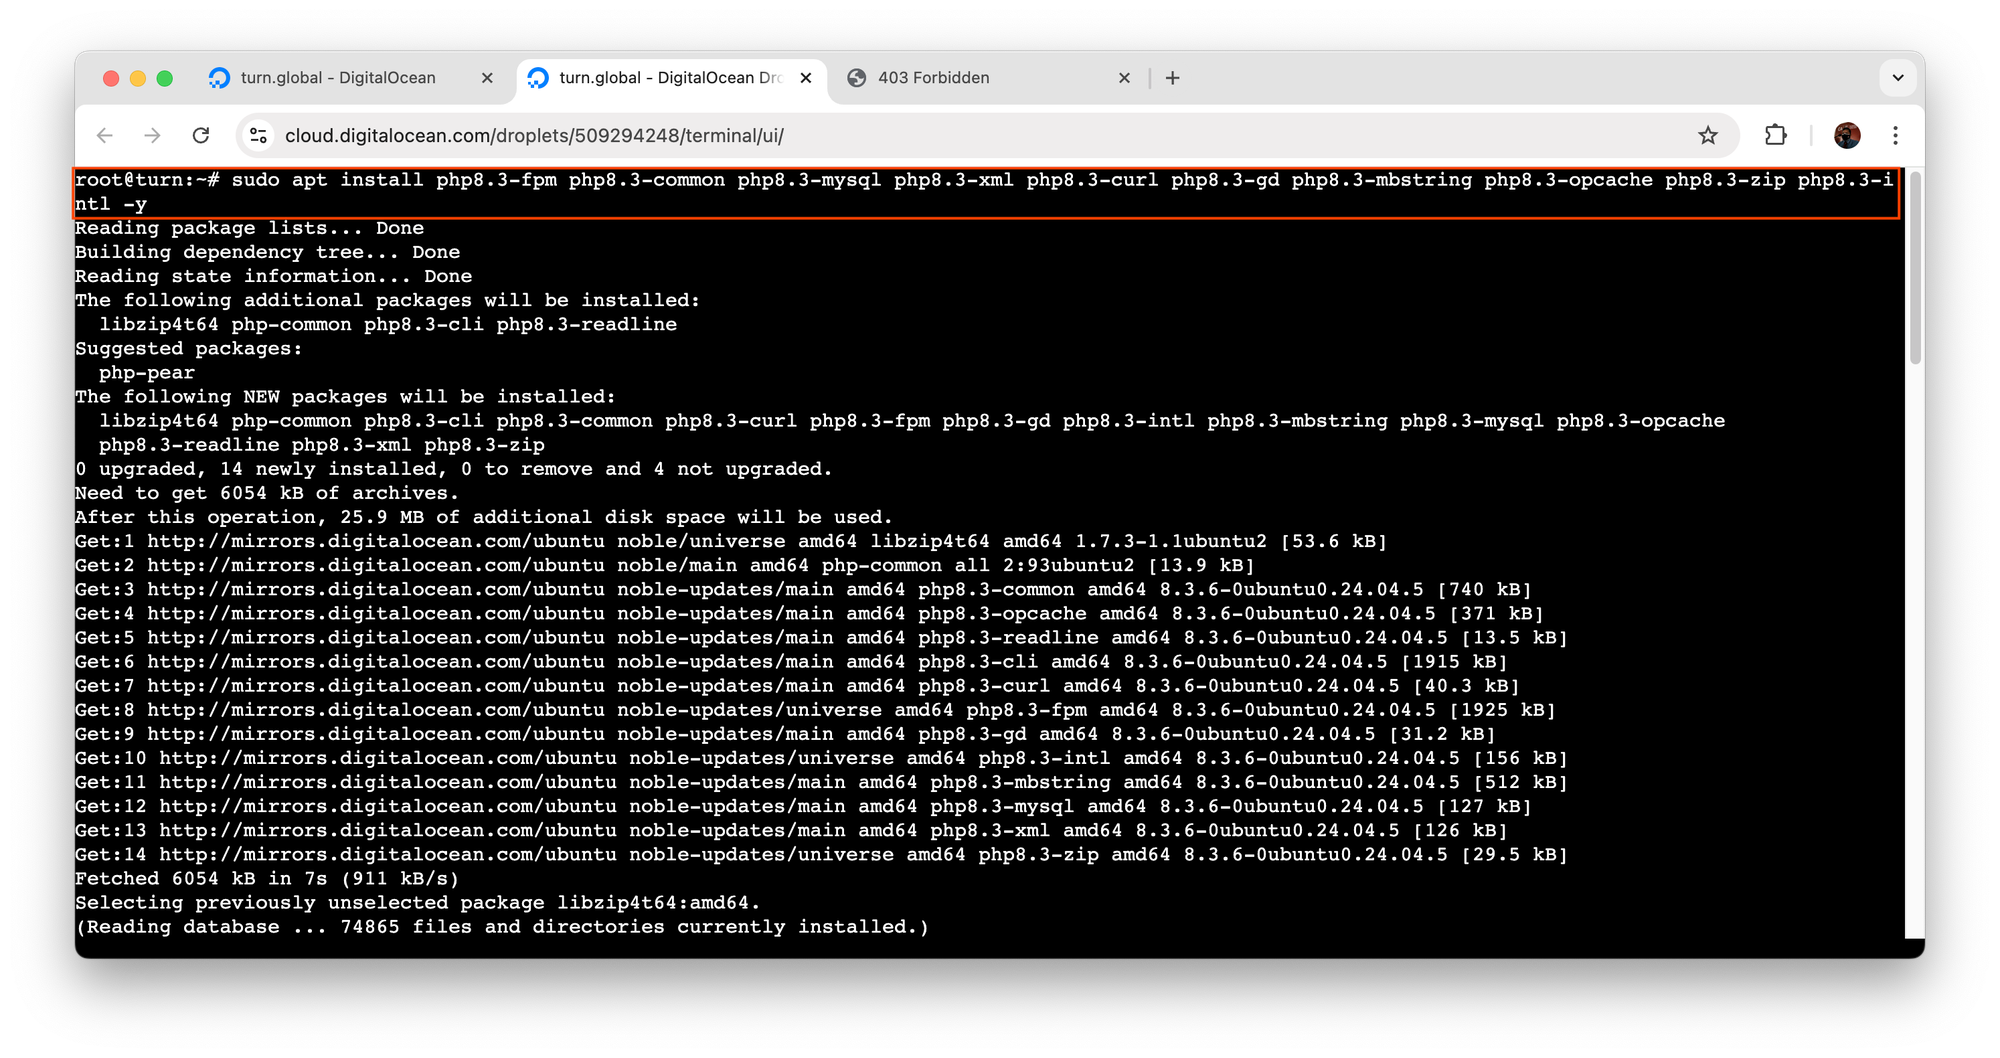
Step 3: Install PHP 8.3 and Required Extensions
PHP is the heart of your WordPress, Laravel, or custom PHP based CMS application. We’ll install PHP 8.3 along with all the essential extensions and secure it for production use.
This will install PHP-FPM (FastCGI Process Manager) and extensions required by popular PHP applications.
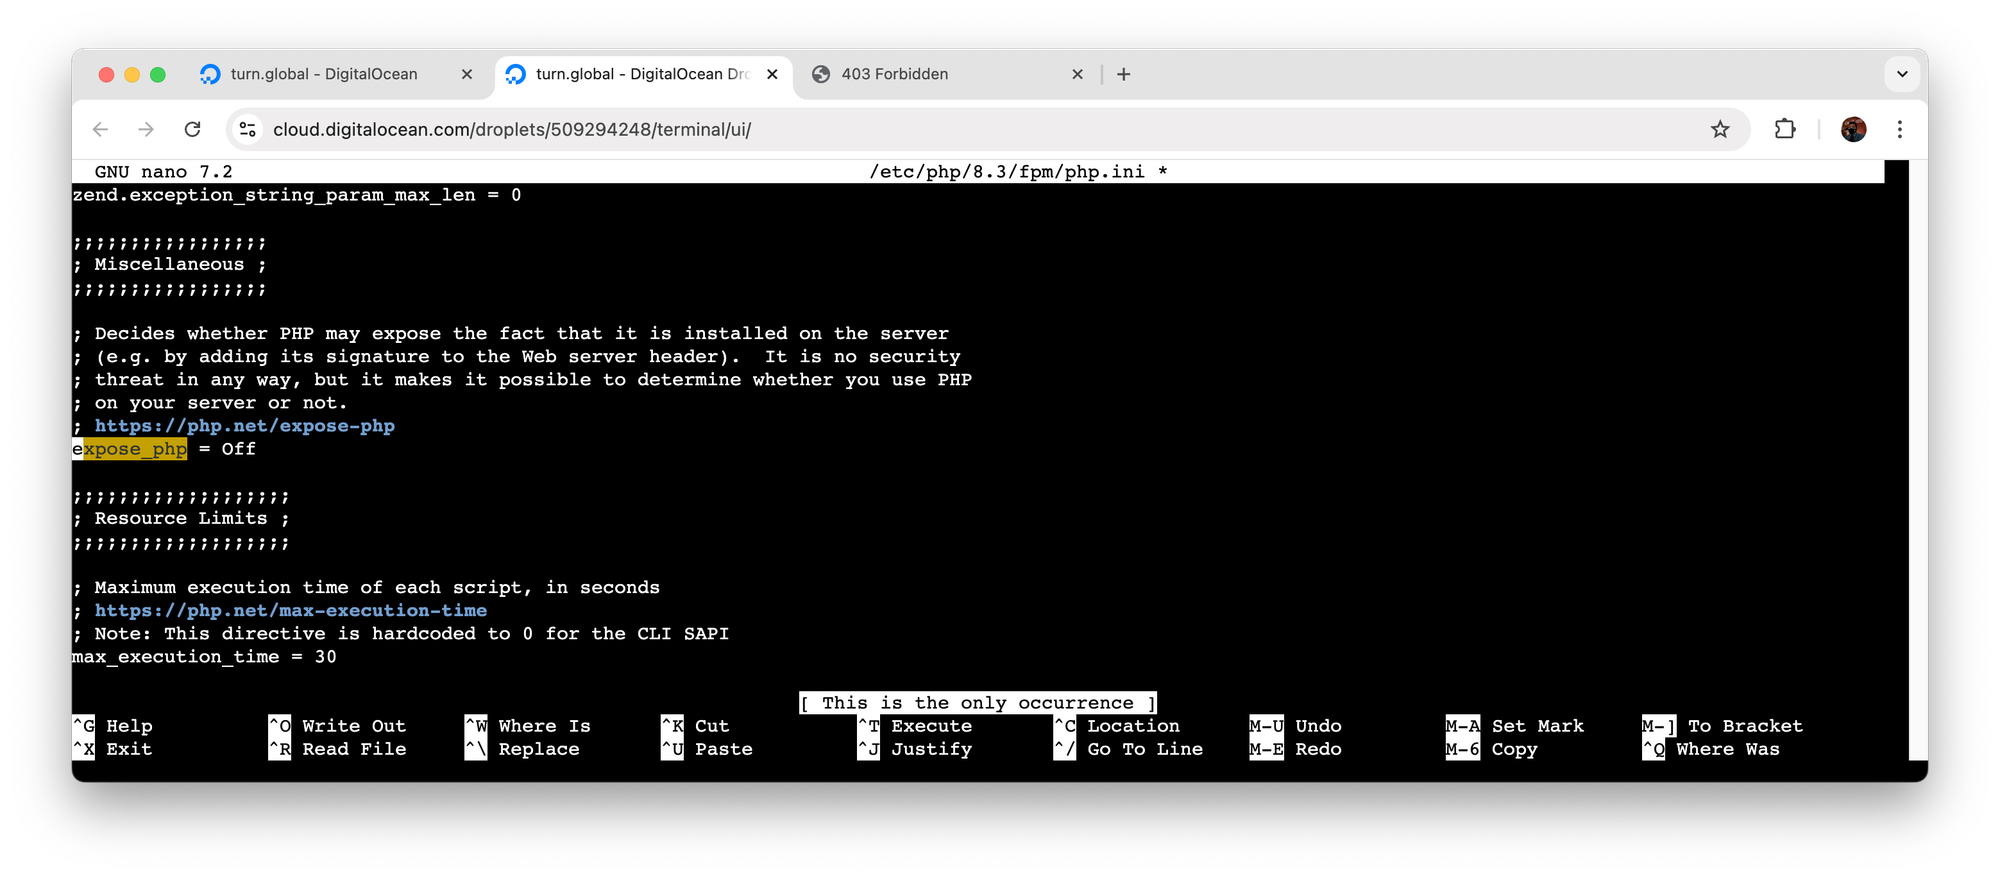
Secure PHP Configuration
Edit PHP Configuration
Open the main PHP configuration file:

Tip: Quickly Find Each Setting
Update or add the following directives for enhanced security. To speed up editing, you can search inside the file using. Press Ctrl + W (hold Control and press W). This opens the search bar at the bottom of the terminal. Then:
- Copy and paste the exact directive name from the list below.
- Press Enter to jump to it. If it doesn’t land exactly, press Enter again to cycle through matches.
disable_functions = exec,passthru,shell_exec,system,proc_open,popen,parse_ini_file,show_source,curl_exec,curl_multi_exec,escapeshellcmd,escapeshellarg,proc_close,proc_get_status,proc_nice,proc_terminate,assert,create_function,eval
; Disable remote file access
allow_url_fopen = Off allow_url_include = Off
; Hide PHP version
expose_php = Off
; Limit upload sizes
upload_max_filesize = 10M
post_max_size = 10M
; Error and log handling
display_errors = Off
log_errors = On
; Secure PHP sessions
session.use_strict_mode = 1
session.cookie_httponly = 1
session.use_only_cookies = 1
session.cookie_secure = 1
You can adjustupload_max_filesizeandpost_max_sizedepending on your site’s requirements.
Save and Exit
When you're done editing:
- Press
Ctrl + Oto save - Press
Enterto confirm - Press
Ctrl + Xto exit
Restart PHP-FPM
Once changes are made, restart PHP-FPM:
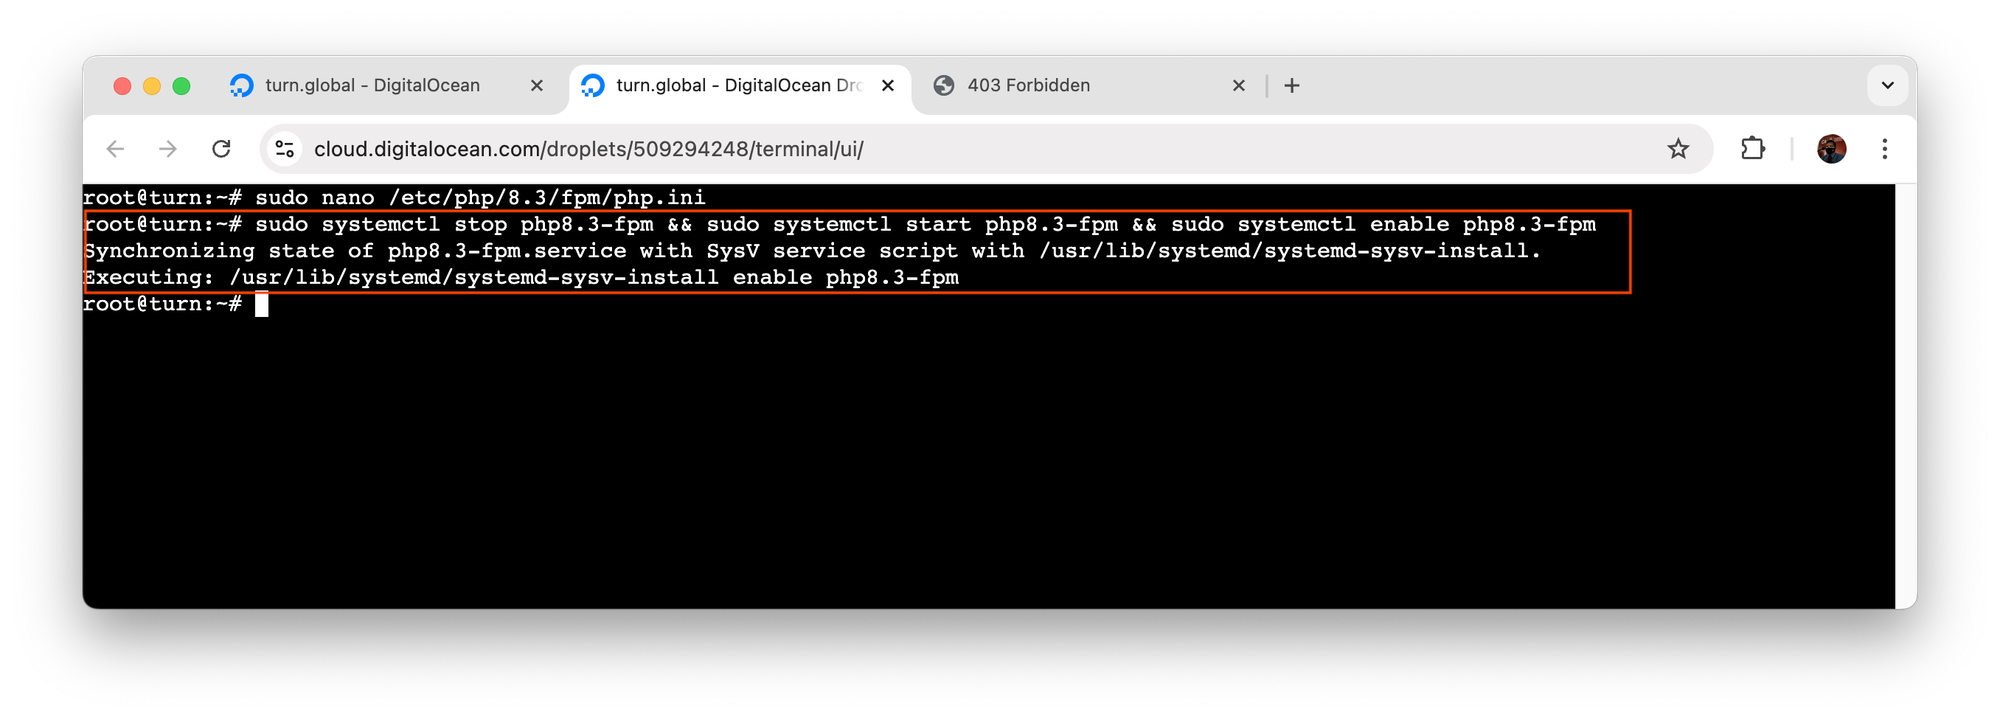
Your PHP environment is now hardened for security and ready to serve modern applications like WordPress, Laravel, or any custom CMS.
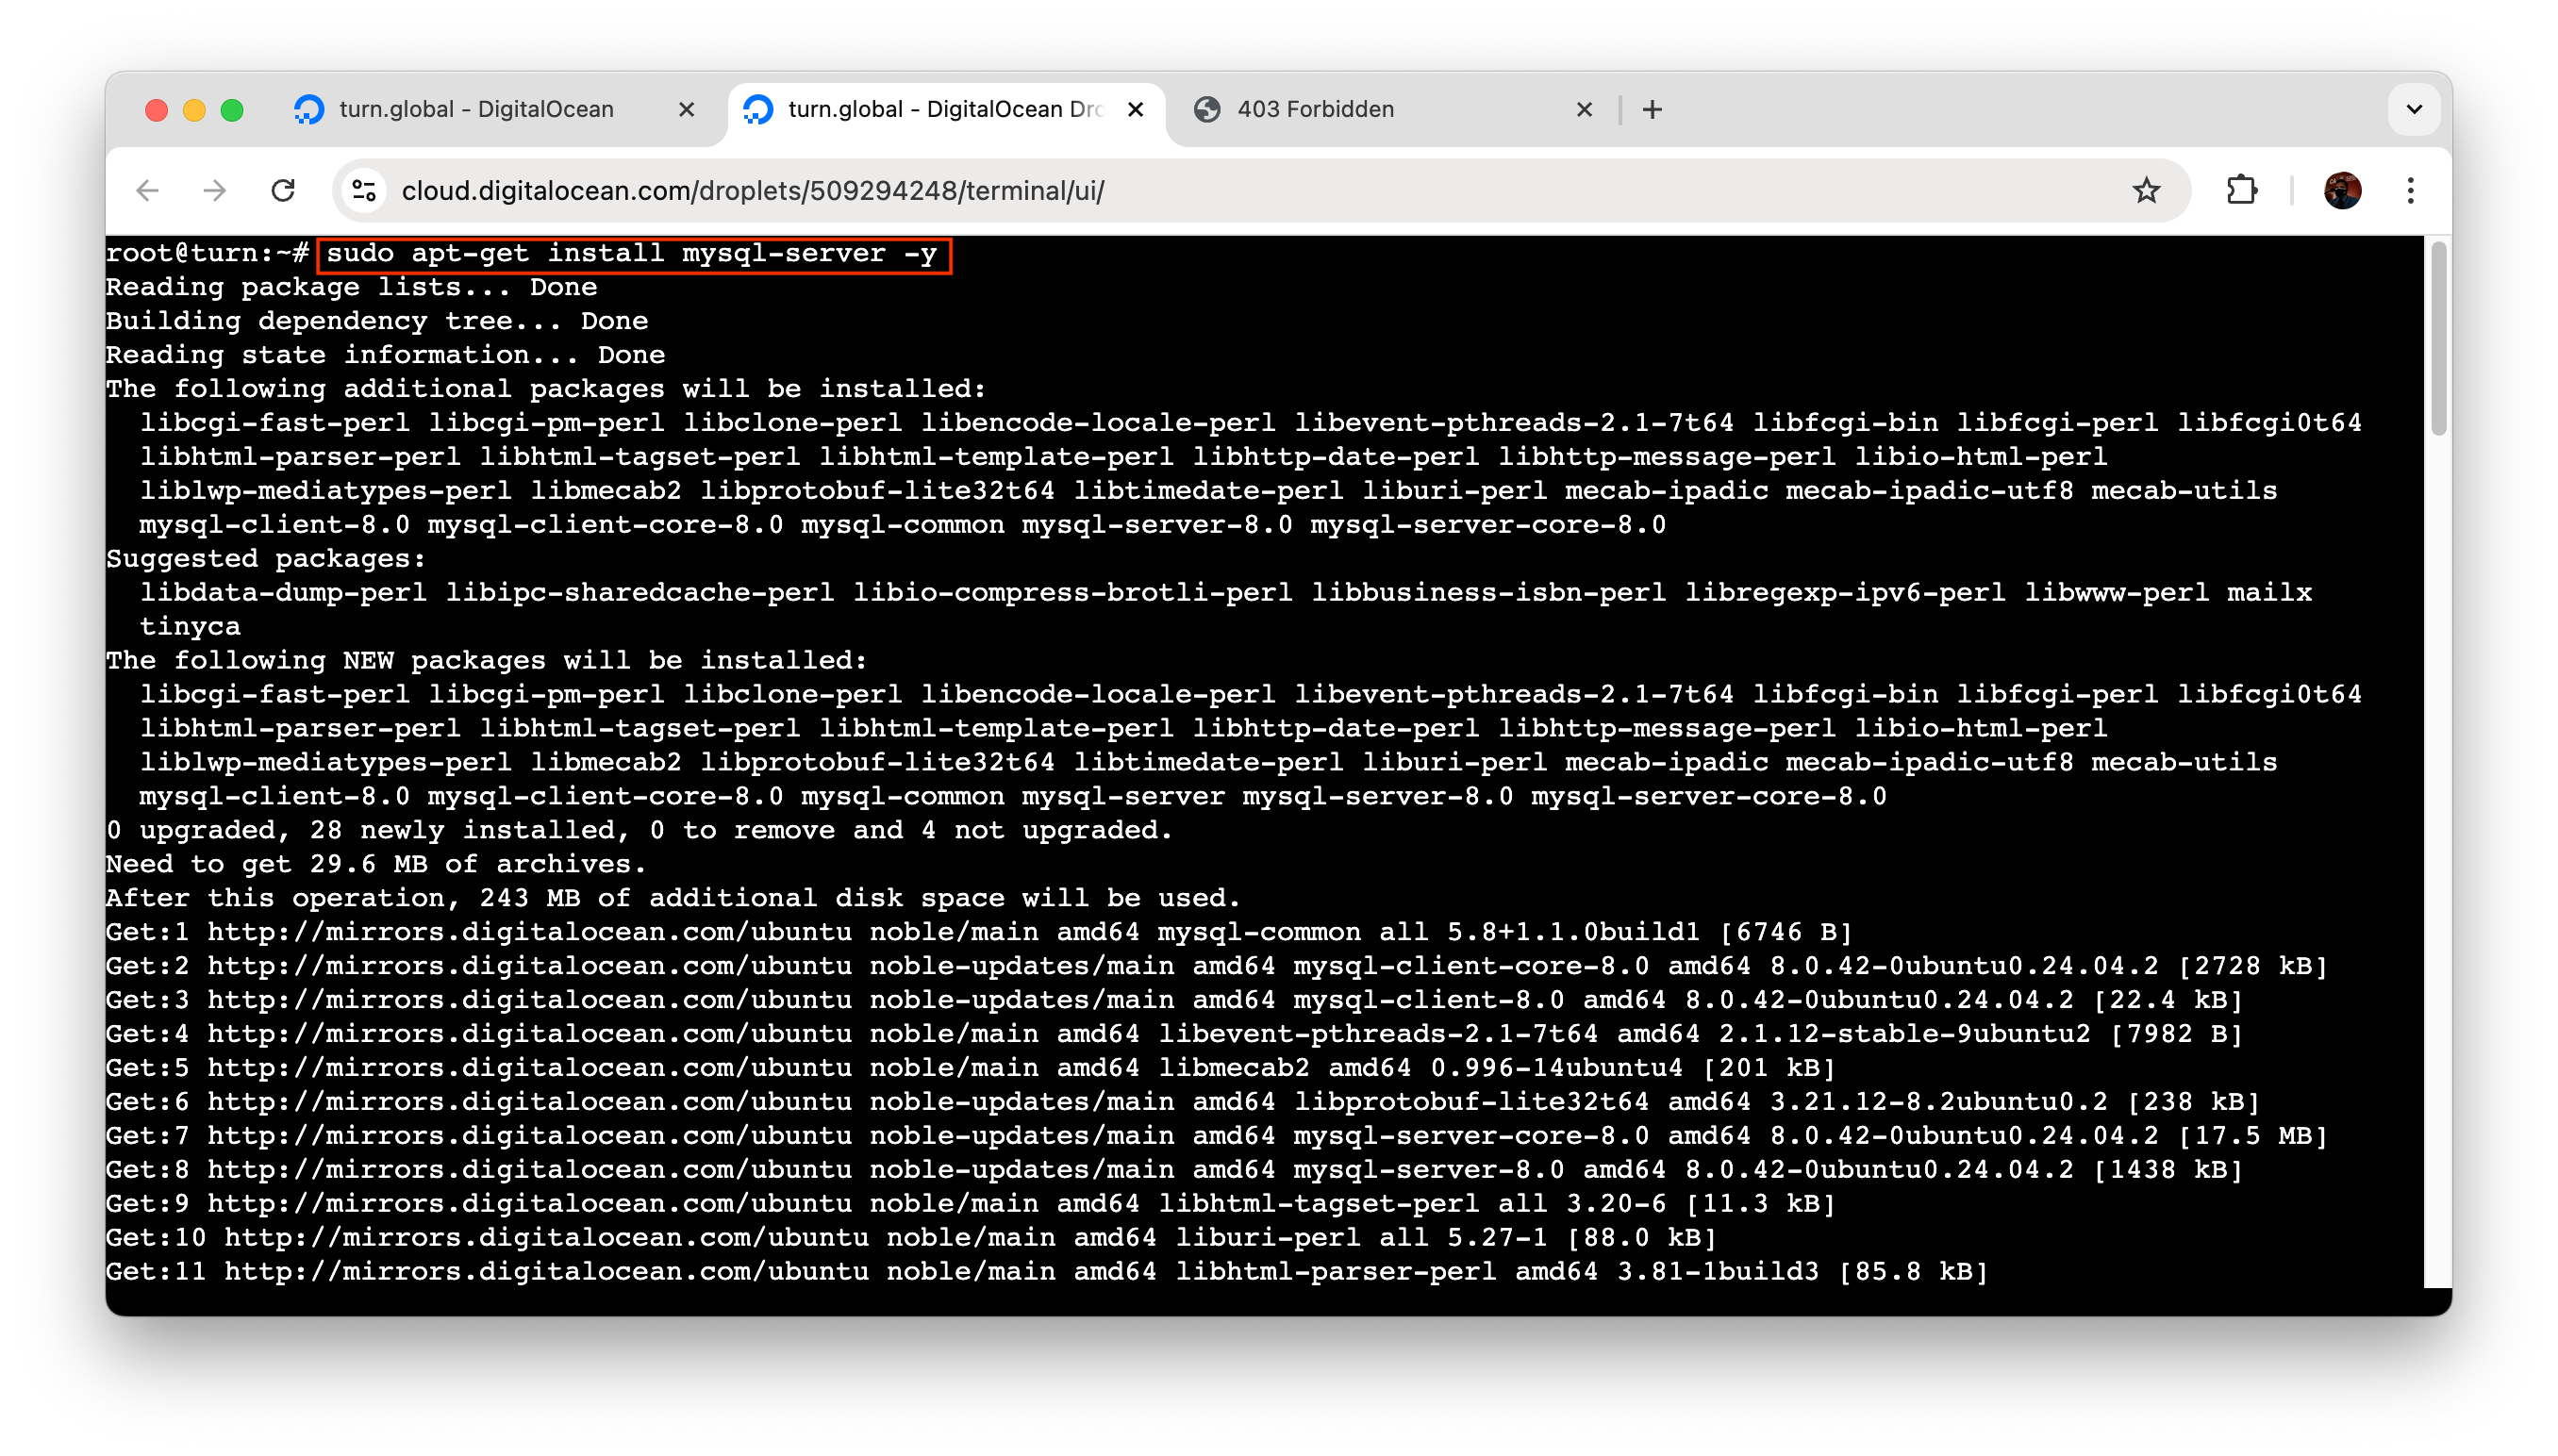
Step 4: Install MySQL Server
MySQL is the most commonly used database for PHP applications:
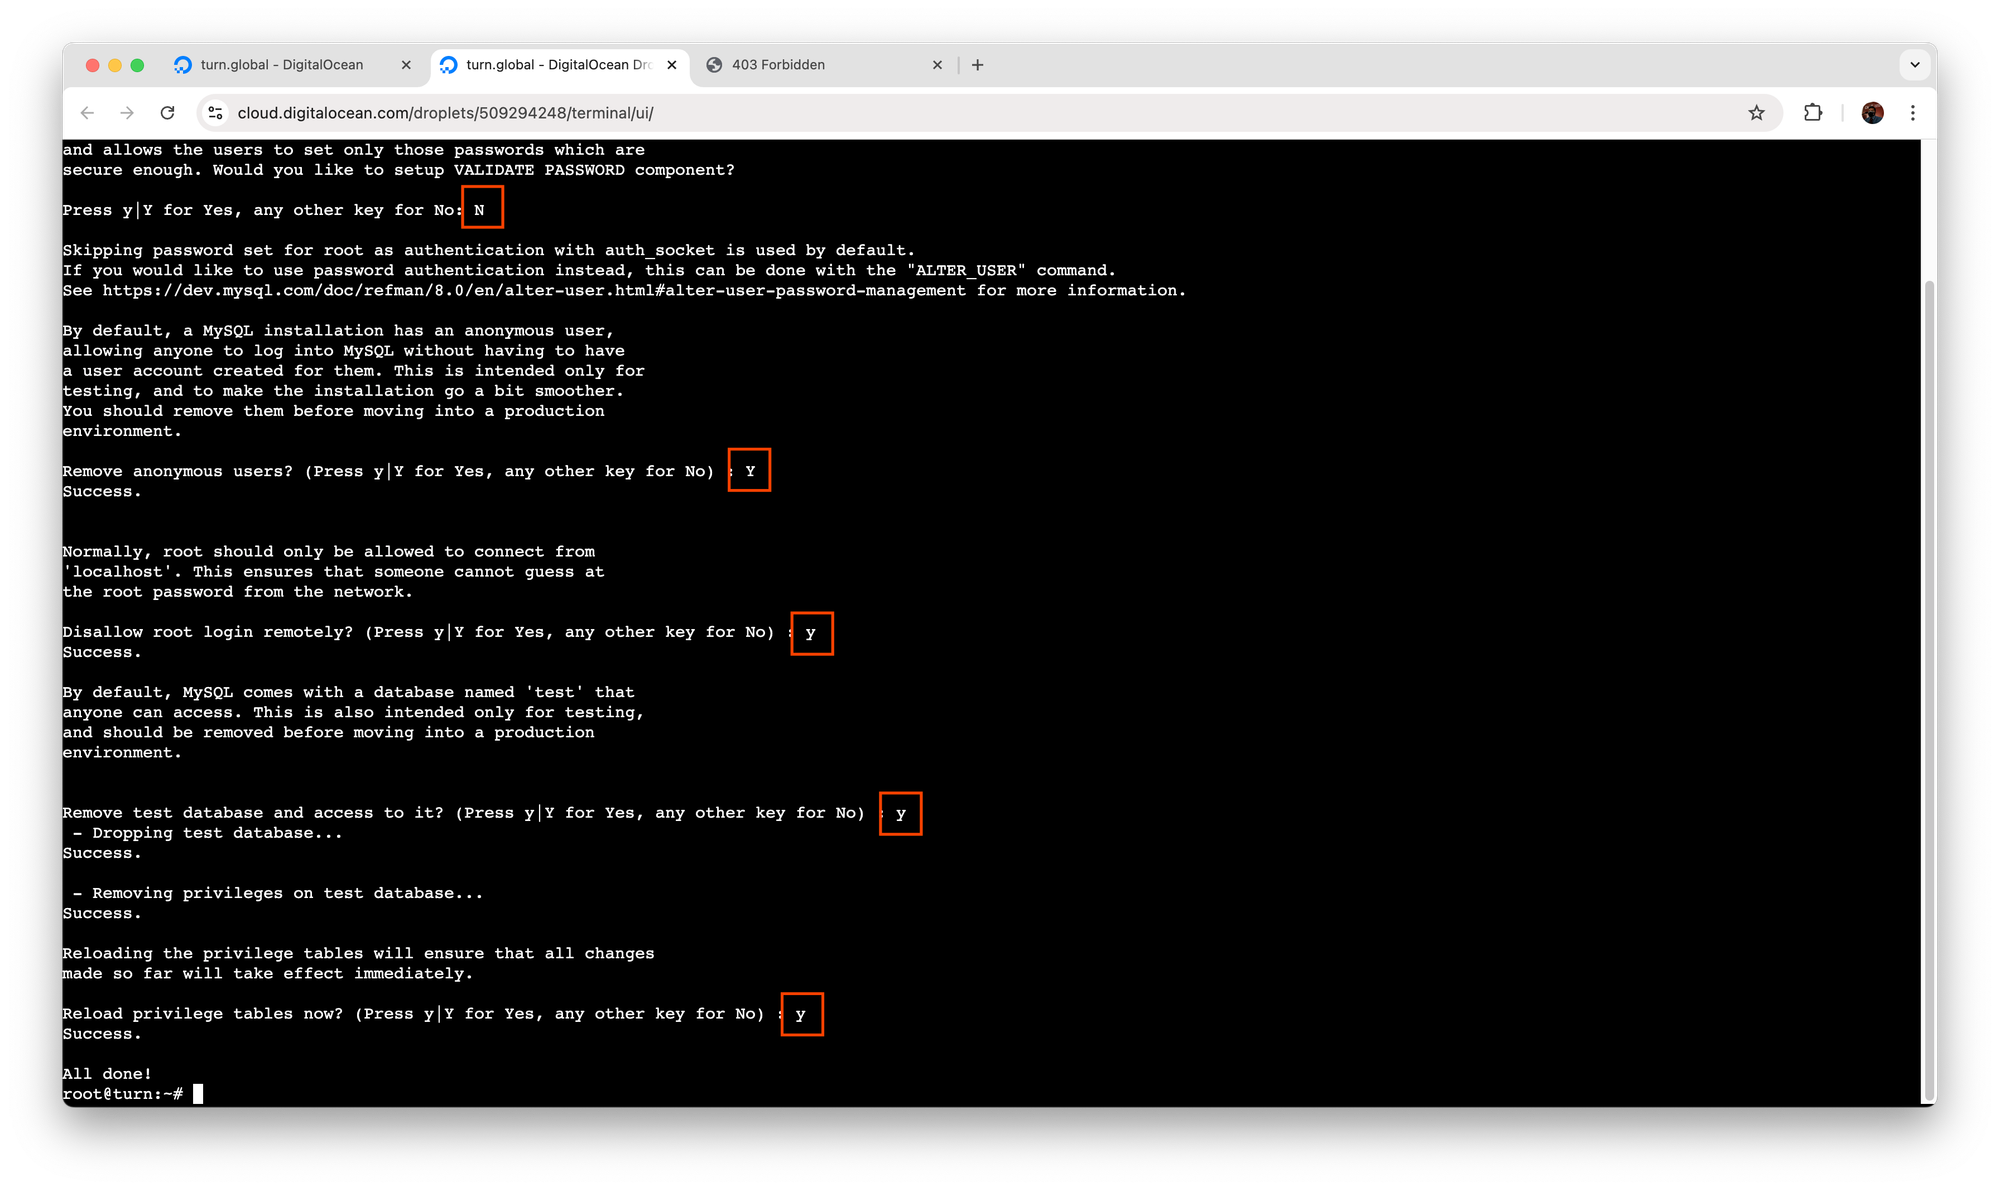
Secure your installation:
You'll be prompted to configure some basic security options. Answer as follows:
- VALIDATE PASSWORD COMPONENT can be used to test passwords...: N
- Remove anonymous users: Y
- Disallow root login remotely: Y
- Remove test database and access to it: Y
- Reload privilege tables: Y
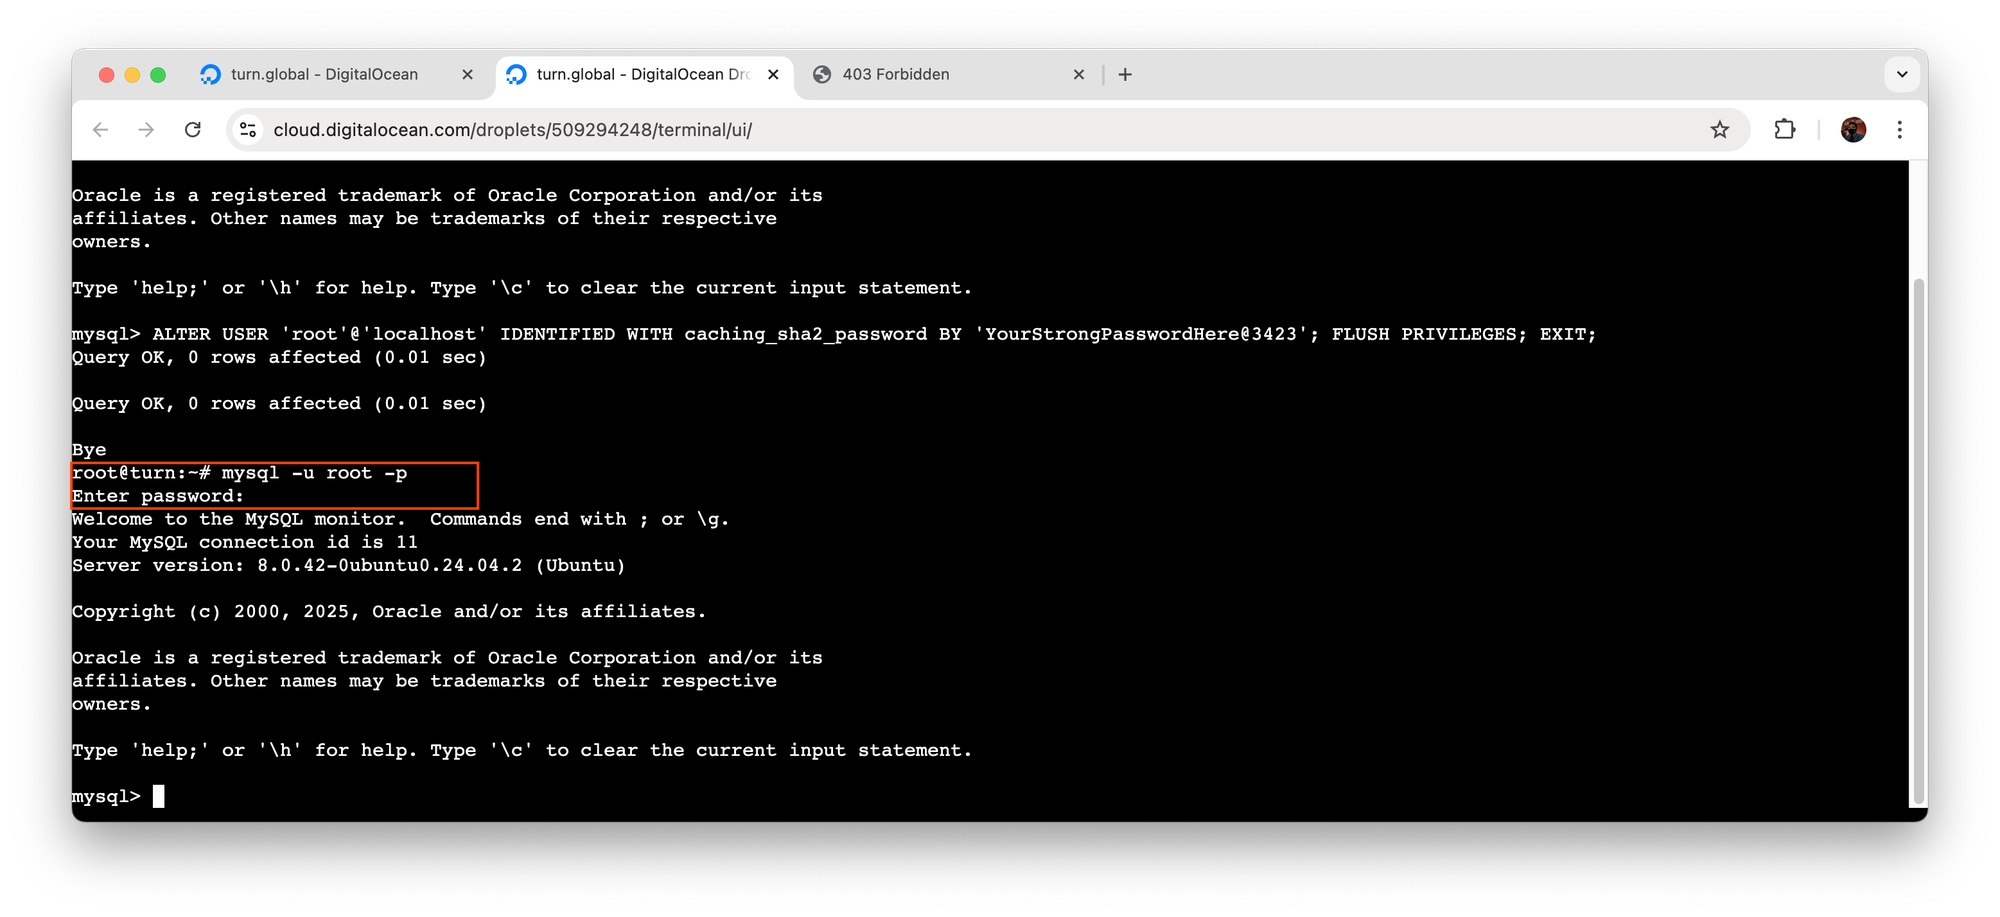
Set MySQL Root Password Manually (Recommended), (no password needed initially)
Once inside the MySQL shell, run the following:
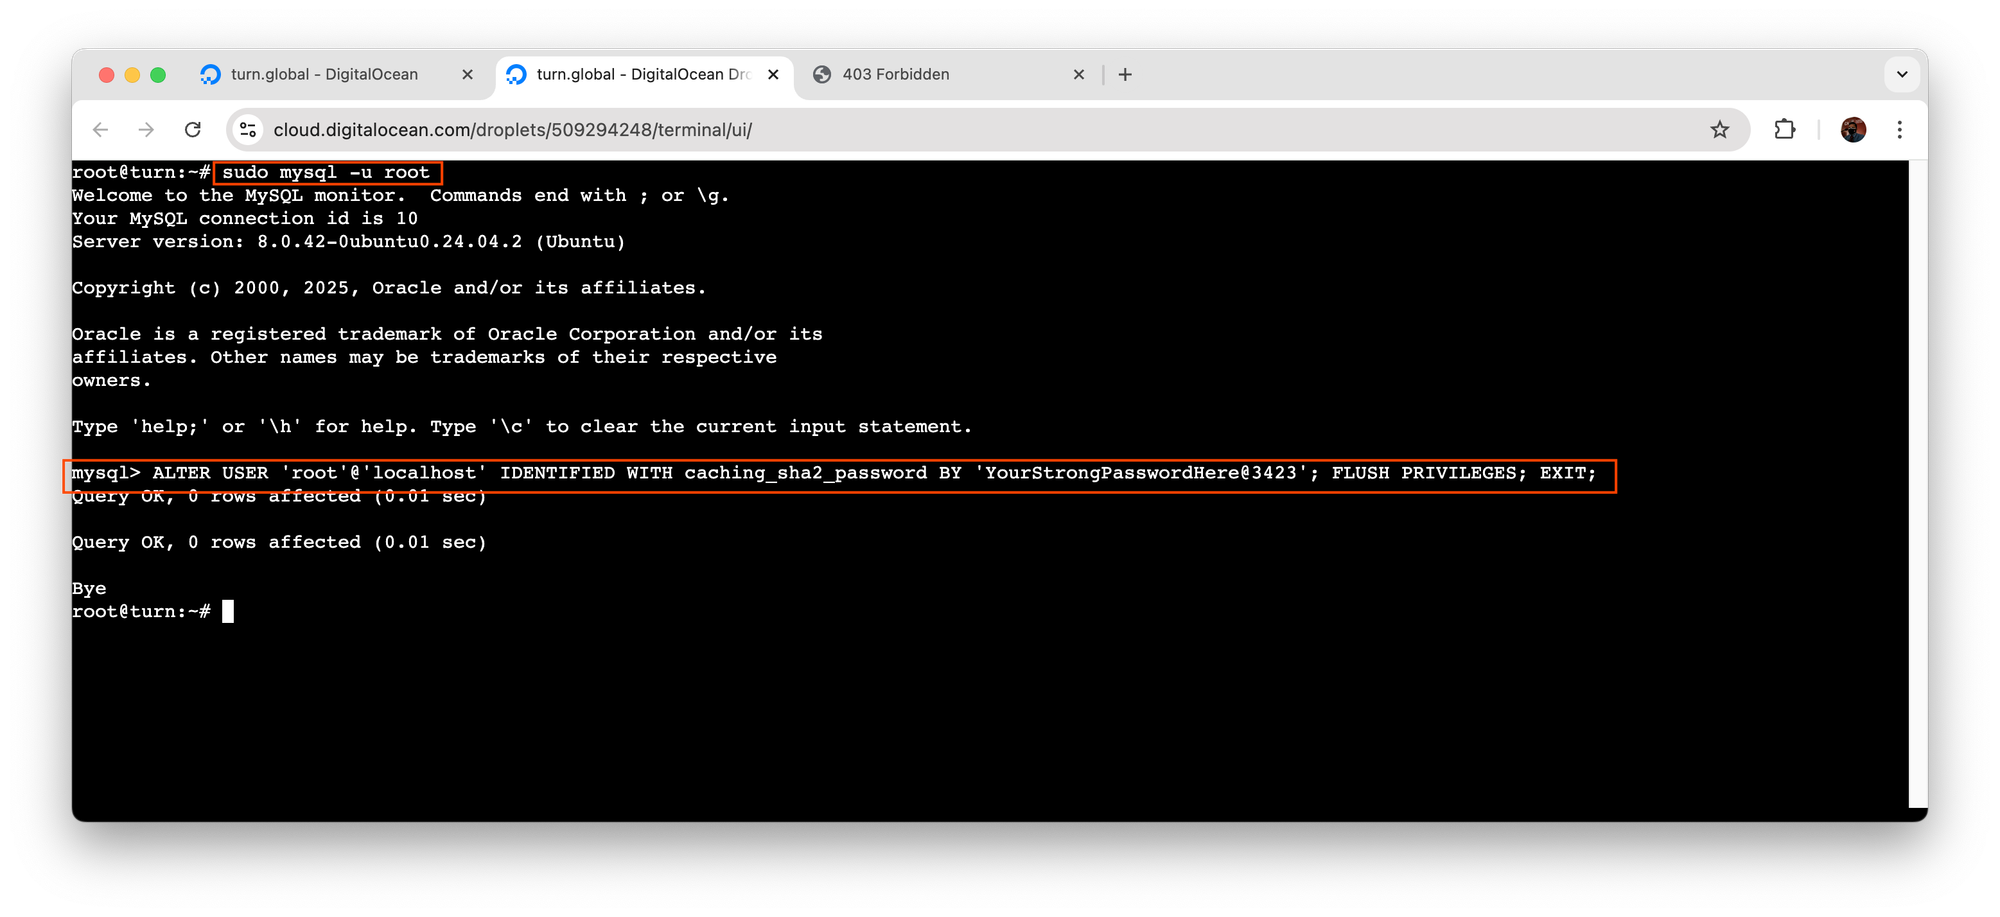
Tip: Replace'YourStrongPasswordHere!'with a secure, unique password, but avoid using characters like#,', or"in your password. These can cause issues in the MySQL shell.
for example,#starts a comment, and'or"can interfere with SQL string syntax, potentially breaking the command. Instead, use a strong combination of uppercase and lowercase letters, numbers, and safe special characters like!,@, or%. Always store your password securely using a trusted password manager.
Then verify it's working:
Enter the new password when prompted.
Step 5: Set Up UFW Firewall & SSH
Your server should never be left open to the internet without a firewall. UFW (Uncomplicated Firewall) is a beginner-friendly way to manage and secure your VPS network.
Enable UFW and Allow SSH
sudo ufw allow OpenSSH
sudo ufw allow 'Nginx Full'
sudo ufw enable
This will allow incoming SSH connections on the default port 22 so you don’t accidentally lock yourself out.
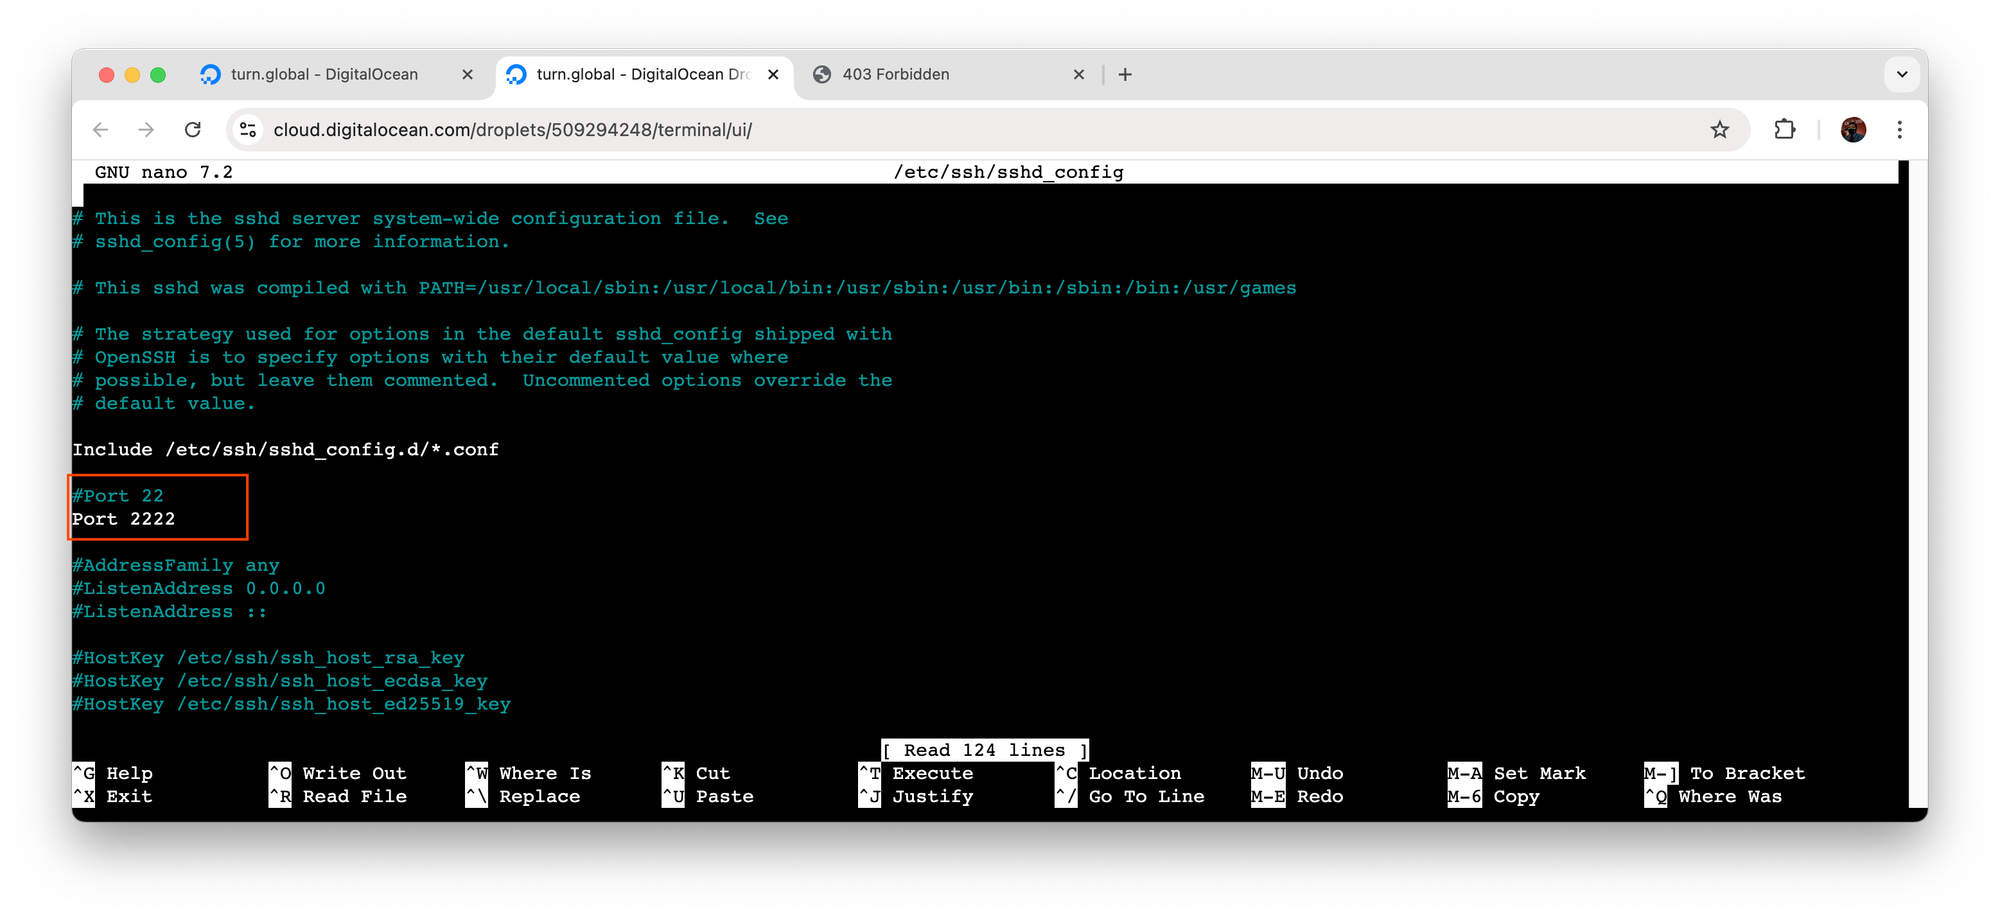
Change the SSH Port for Extra Security
To reduce brute-force attacks, you can optionally change the default SSH port to something custom (e.g. 2222).
Open the SSH config:
Find and edit the line:
Uncomment it and change it to something like:
Port 2222
Avoid common ports like 80, 8080, 443, 587 or 3306.
Save and Exit
When you're done editing:
- Press
Ctrl + Oto save - Press
Enterto confirm - Press
Ctrl + Xto exit
Allow the Custom Port in UFW
If you changed the port to 2222, you must allow it:
For the new port to take effect, restart the SSH service:
Enable and Verify UFW
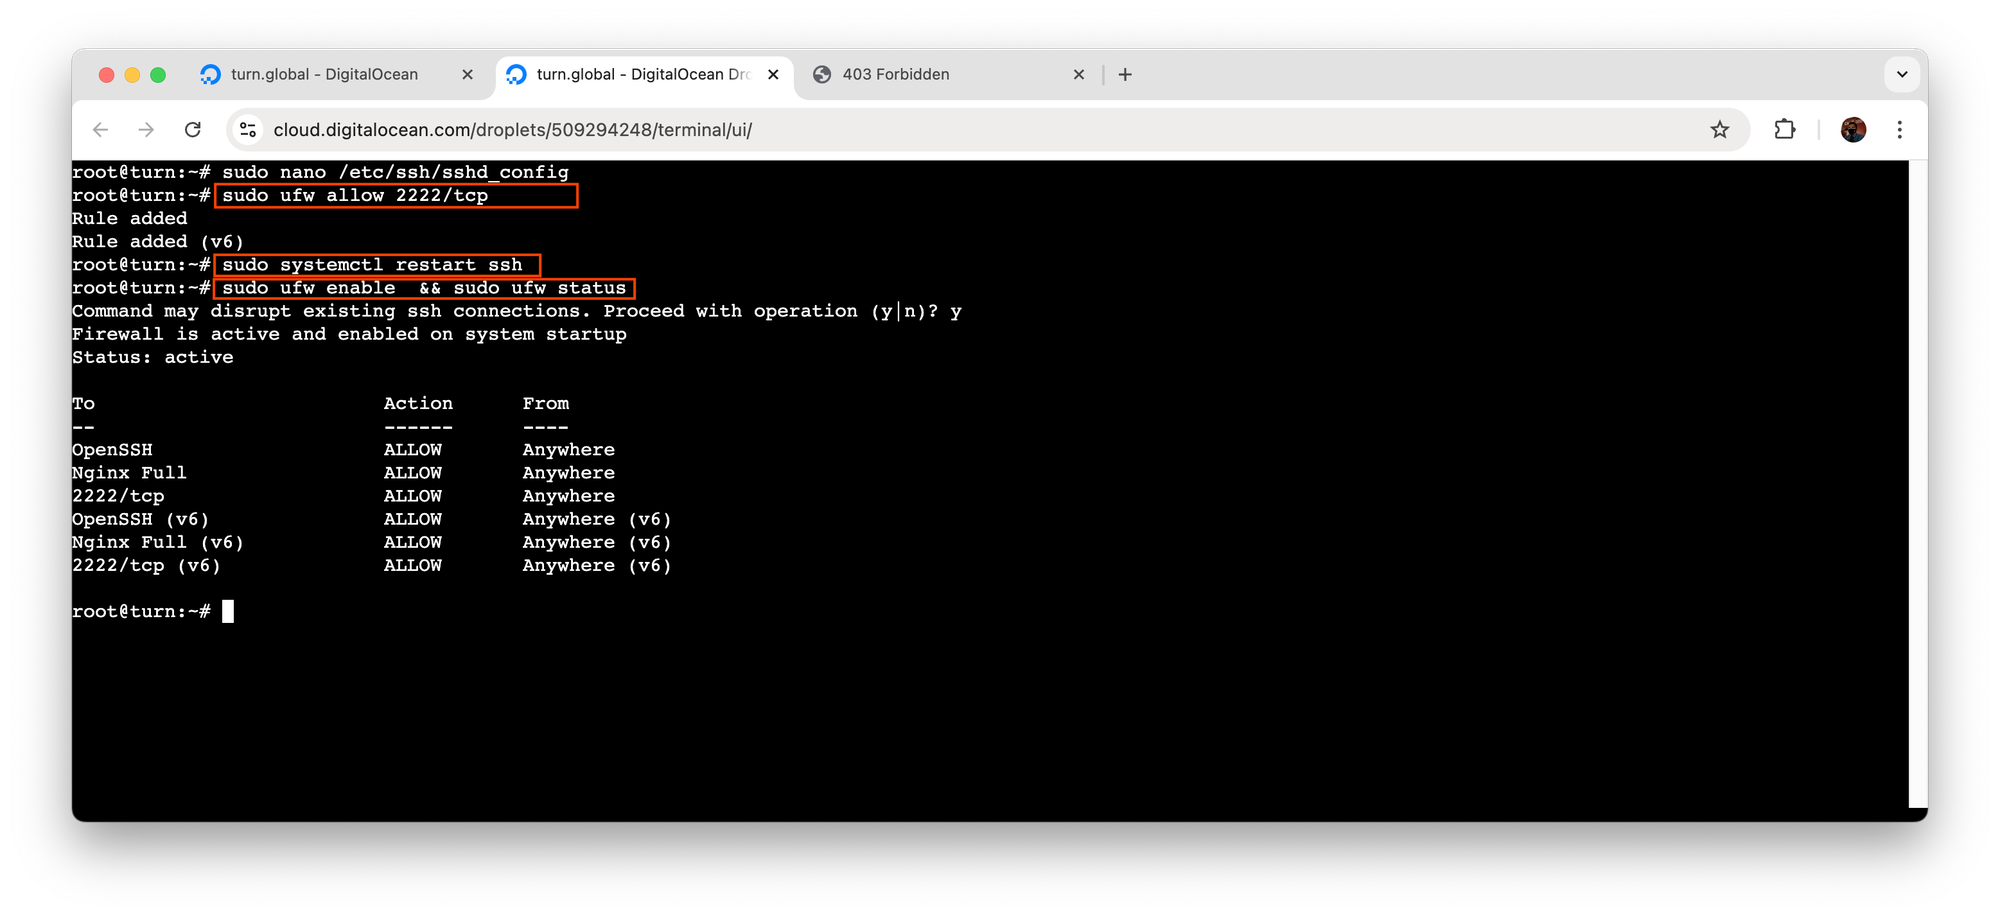
Then, after successfully logging in with the new SSH port (as shown in Step 1 above), you can optionally remove the default UFW rule that allows port 22.
Step 6: Install Let's Encrypt SSL with Certbot
To serve your site over HTTPS, install Certbot:
Step 7: Initial Configuration for PHP-Based Applications
At this point, your VPS is fully equipped with:
- ✅ Nginx Web Server
- ✅ PHP 8.3 with all necessary extensions
- ✅ MySQL Database
- ✅ Secure and optimized configurations
- ✅ SSL and firewall protection
Now it's time to move forward and deploy your actual application — whether it’s Laravel, WordPress, or a custom PHP project.
Deploy Laravel or WordPress
We’ve prepared two in-depth articles to guide you through setting up your application:
Laravel VPS Deployment Guide
Learn how to configure your .env file, generate keys, set folder permissions, Github Configuration and link your domain to Laravel.
WordPress VPS Setup Guide
Covers database creation, uploading WordPress files, setting correct permissions, and securing your site.
These articles include everything from creating databases, Nginx site blocks, and launching your web application live on a domain.
Member discussion